Create a connector
To create a connector, follow the steps below:
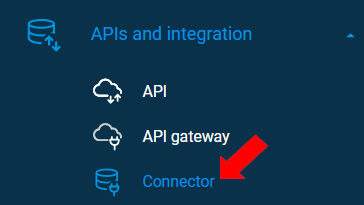
To go to the Connector template, select the Connector menu item under the “APIs and integration” menu.

On the “APIs and integration” page, click the [+ Connector] button.
On the “New Connector” page, the Connector>Details tab is preselected.
Enter the connector name.
Optionally add a description of the connector.
Select the type of connector and add the needed credentials as described below. When users add credentials, the password is maintained in the session until the user closes the connector page. In later views to the connector details, the password is not transferred, and the page will work with an encrypted text for the password. The users may change the password, provided that they have the rights. As per the image below, there is also a quick-create option to create and edit a Connector within the ETL pipeline (under Data Source or Data Destination). (See more details in the ETL pipeline section.)
To save the settings, click the [Save] button. The [Test connection] button gets activated. If the user clicks the [Save & Close] button, the connector page will save and close.
To test the connection, click the [Test connection] button.
When the connection test is successful, it displays a success message.
Last updated
