# Setting up Microsoft Azure Account

To set up a Microsoft Azure Account, follow the steps below:

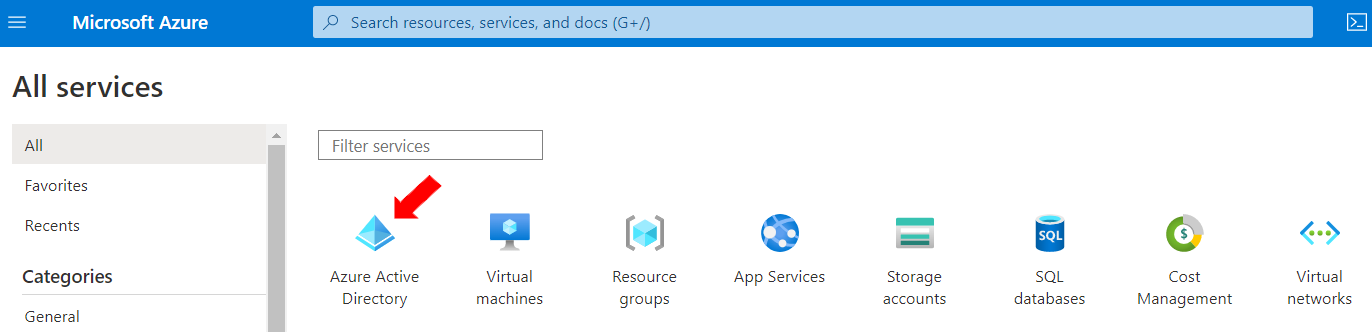
* Open [Azure Portal](https://portal.azure.com/) and Navigate to [Azure Active Directory](https://portal.azure.com/#blade/Microsoft_AAD_IAM/ActiveDirectoryMenuBlade/Overview) to create a new application.

<figure><img src="https://media.langstack.com/documentation/media/images/connector/onedriveconnector/odallservazactdir.png" alt=""><figcaption></figcaption></figure>

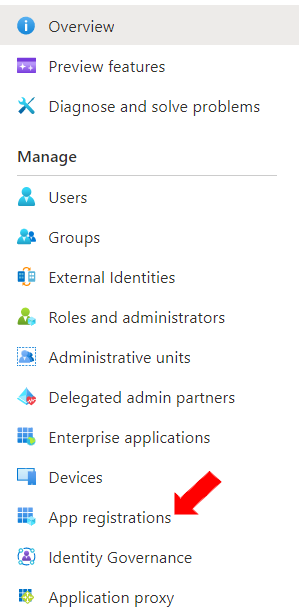
* On the left panel, select App Registration.

<figure><img src="https://media.langstack.com/documentation/media/images/connector/onedriveconnector/odappsregmenu2.png" alt=""><figcaption></figcaption></figure>

* The [App Registration](https://portal.azure.com/#blade/Microsoft_AAD_IAM/ActiveDirectoryMenuBlade/RegisteredApps) page displays. To start the registration for Azure AD application, click on \[+ New registration].

<figure><img src="https://media.langstack.com/documentation/media/images/connector/onedriveconnector/odnewreg3.png" alt=""><figcaption></figcaption></figure>

* To register an application, add the following details:
  1. Enter Application name.
  2. Under Supported account types select “Accounts in any organizational directory (Any Azure AD directory - Multitenant) and personal Microsoft accounts (e.g. Skype, Xbox)’ Selecting this option ensures maximum account support for the user’s application.

<figure><img src="https://media.langstack.com/documentation/media/images/connector/onedriveconnector/odclickreg5.png" alt=""><figcaption></figcaption></figure>

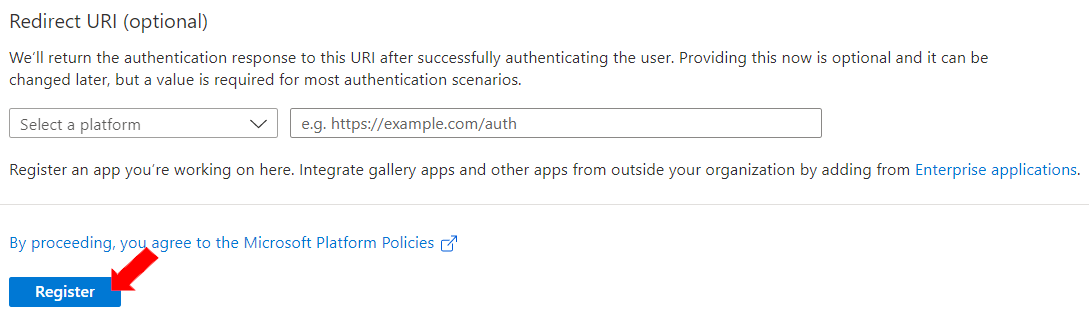
* Click \[Register] to complete the process.

<figure><img src="/files/oYBlJGbvLemRnFfTgqbR" alt=""><figcaption></figcaption></figure>

* After successful creation, the user is directed to the Overview Window. Under the Essentials section, to create a Client Secret for your application click on ‘Add a certificate or secret’.

<figure><img src="https://media.langstack.com/documentation/media/images/connector/onedriveconnector/odaddcertorsecr6.png" alt=""><figcaption></figcaption></figure>

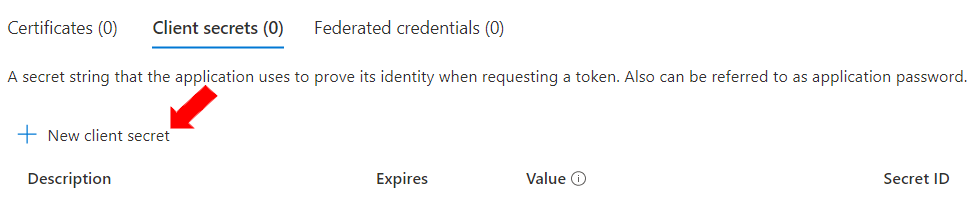
* To add Client Secret and Expiry, click “New Client Secret”.&#x20;

<figure><img src="https://media.langstack.com/documentation/media/images/connector/onedriveconnector/odaddnewclisec7.png" alt=""><figcaption></figcaption></figure>

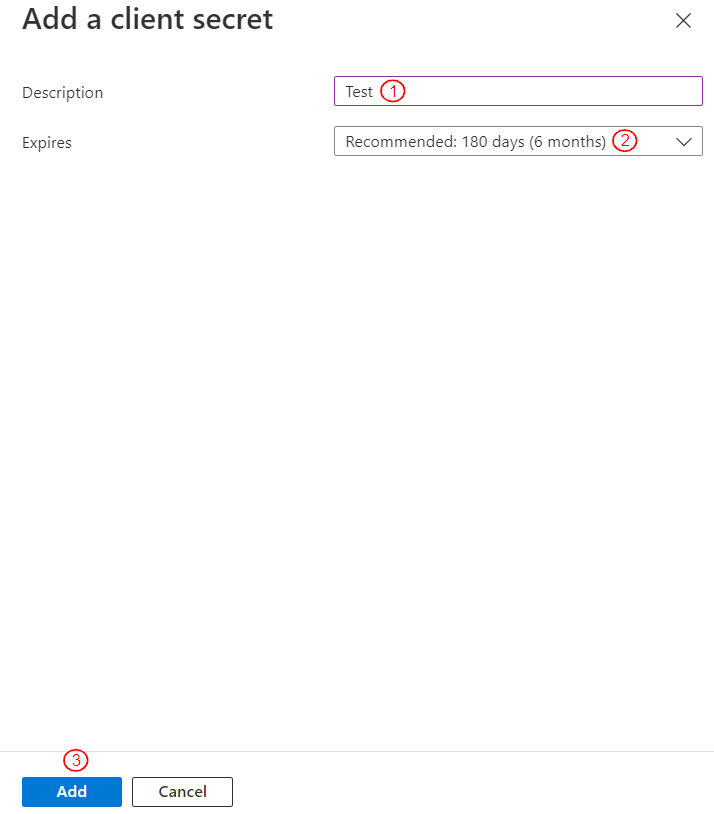
* Enter the following details under “Add a client secret”:&#x20;
  1. Enter description.&#x20;
  2. By default, the option “Recommended 6 months time period” is selected.&#x20;
  3. Click \[Add] to save changes.

<figure><img src="https://media.langstack.com/documentation/media/images/connector/onedriveconnector/odaddclisecdets8.png" alt=""><figcaption></figcaption></figure>

* The client secret details display. Copy the Client Secret shown under “Value” and secure it to be later used while setting up Connector.\
  Note: Client secret values will become unavailable to be copied except for immediately after creation.

<figure><img src="https://media.langstack.com/documentation/media/images/connector/onedriveconnector/odclisecret9.png" alt=""><figcaption></figcaption></figure>

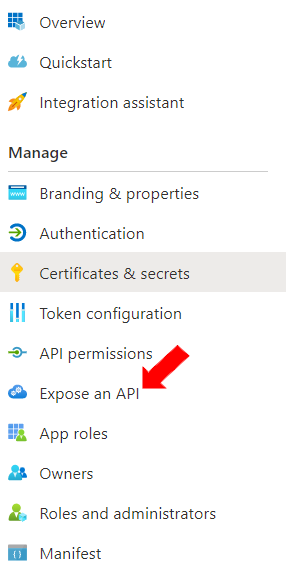
* On the left side panel, click on “Expose an API”.

<figure><img src="https://media.langstack.com/documentation/media/images/connector/onedriveconnector/odexposeapimenu10.png" alt=""><figcaption></figcaption></figure>

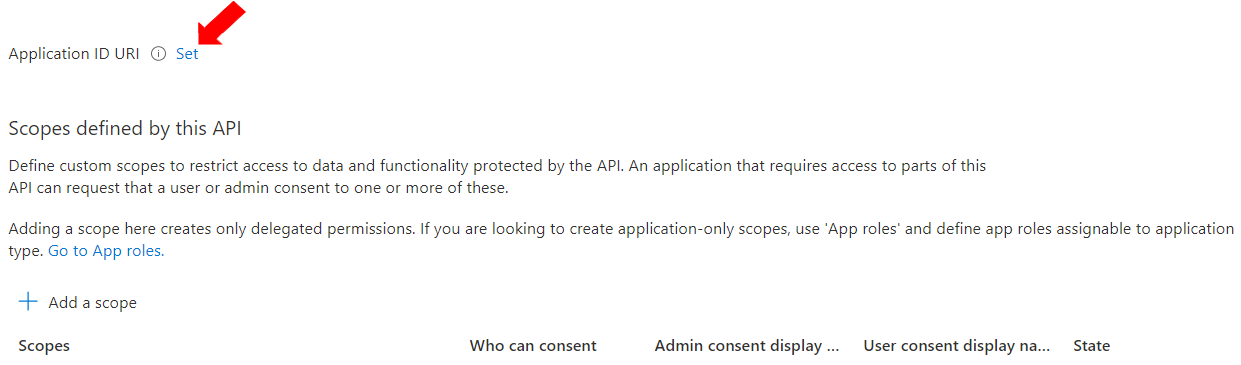
* Click on “Set” (after the text ‘Application ID URI’).&#x20;

<figure><img src="https://media.langstack.com/documentation/media/images/connector/onedriveconnector/odappiduri11.png" alt=""><figcaption></figcaption></figure>

* After clicking “Set”, a field with an API ID URI displays. To save the API ID URI, click \[Save].

<figure><img src="https://media.langstack.com/documentation/media/images/connector/onedriveconnector/odsetappiduri12.png" alt=""><figcaption></figcaption></figure>

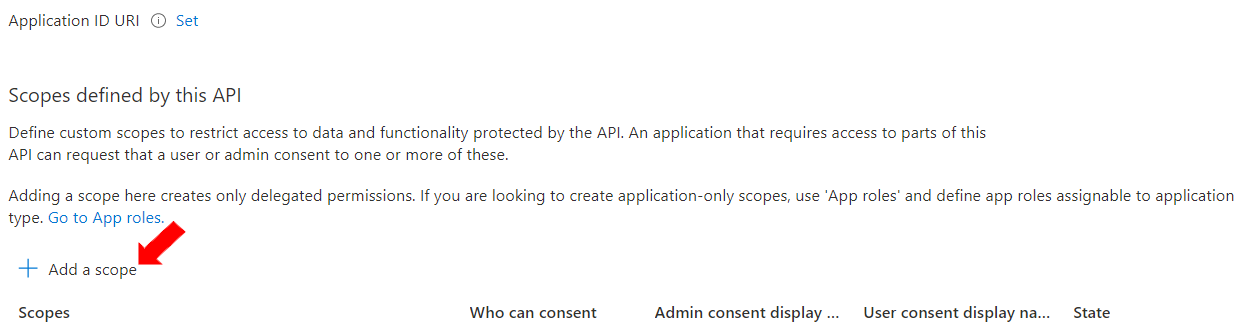
* Under the “Scopes defined by this API”, click on “+ Add a Scope”.

<figure><img src="https://media.langstack.com/documentation/media/images/connector/onedriveconnector/odaddscope13.png" alt=""><figcaption></figcaption></figure>

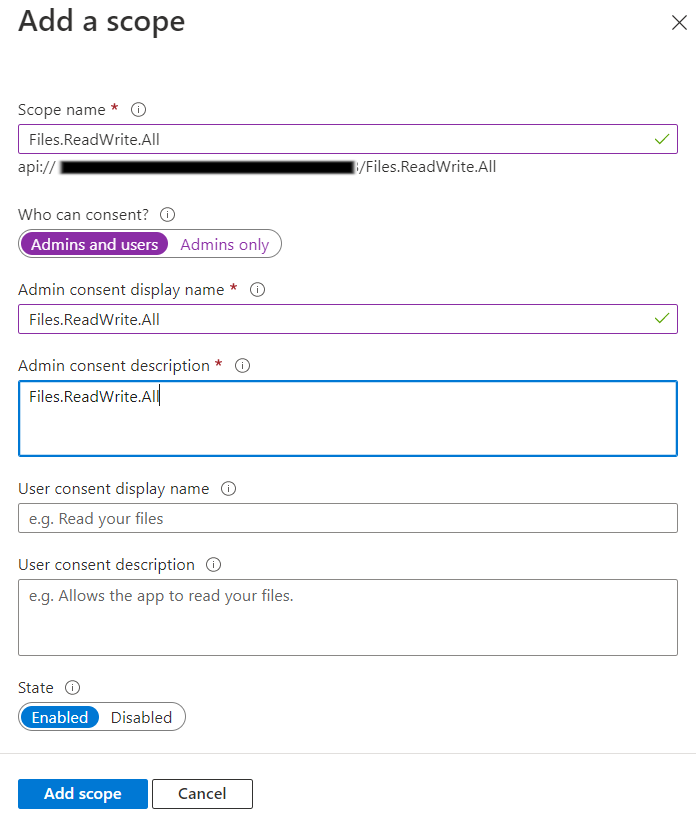
* Define the displayed window “Add a scope” as follows and click on \[Add scope].:&#x20;
  * Scope name: Files.ReadWrite.All&#x20;
  * Who can consent? : Admins and users&#x20;
  * Admins consent display name: Files.ReadWrite.All&#x20;
  * Admin consent description: Files.ReadWrite.All&#x20;
  * State: Enabled

<figure><img src="https://media.langstack.com/documentation/media/images/connector/onedriveconnector/odaddscopesdet14.png" alt=""><figcaption></figcaption></figure>

* Under the “Authorized client applications”, click on “+ Add a client application”.

<figure><img src="https://media.langstack.com/documentation/media/images/connector/onedriveconnector/odaddclientapp15.png" alt=""><figcaption></figcaption></figure>

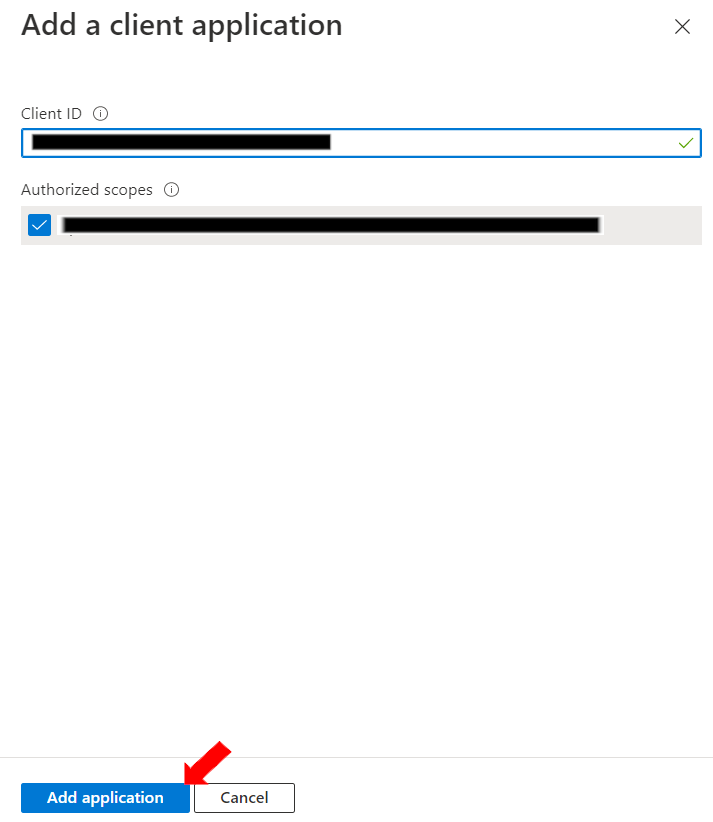
* Under “Add a client application”, add the Client ID/Application (client) ID and select the application scope below it. To add the application, click \[Add the Application].

<figure><img src="https://media.langstack.com/documentation/media/images/connector/onedriveconnector/odaddaclientapp16.png" alt=""><figcaption></figcaption></figure>

* After this step the Application is configured. Now Navigate to Langstack and Open Connector to set up a new OneDrive Connector.

---

# Agent Instructions: Querying This Documentation

If you need additional information that is not directly available in this page, you can query the documentation dynamically by asking a question.

Perform an HTTP GET request on the current page URL with the `ask` query parameter:

```
GET https://docs.langstack.com/welcome/in-depth-learning/connectors/onedrive-connector/setting-up-microsoft-azure-account.md?ask=<question>
```

The question should be specific, self-contained, and written in natural language.
The response will contain a direct answer to the question and relevant excerpts and sources from the documentation.

Use this mechanism when the answer is not explicitly present in the current page, you need clarification or additional context, or you want to retrieve related documentation sections.