LogoLogo
HomeCommunityLangstack.comCreate free account
  • 🤝Welcome
  • 🙌Support
  • 💡Get started
    • 📕Learn Langstack
      • Introduction to Langstack
        • Application templates
        • Storage frameworks
        • Account administration
      • Basics and essentials
        • What is an API gateway?
        • How to work with an API gateway
        • What is an Entity?
        • What is an Action box?
          • How to create and work with Action boxes
          • How to perform search in Actions
        • What is an Action?
          • How to create and work with Actions
          • Error propagation
          • Actions in Langstack applications
        • What is a Data type?
          • Simple Data types
        • What is a Variable?
          • Naming rules of a Variable
        • What is a Function?
          • Working with Functions
        • Navigating to a Variable or a Function
        • Implicit Type Conversion (ITC)
        • Explicit Type Conversion
        • Implicit and Explicit Type Conversion for Json
        • Next Steps
      • User management
        • What is a Privilege?
        • What are Groups?
        • What are Users?
      • Introduction to REST API
        • API Name
        • API Group name
        • Request and Response body
          • Request body
          • How to create and work with a Request body
          • Response body
          • How to create and work with a Response body
        • Query strings
          • How to create and work with Query strings
        • Headers
          • How to create and work with Headers
        • Path parameter
        • Create your first API: "Hello World!"
          • Working with API options
        • Exercise 1: GET REST API & Return Response Object
          • Step 1: Create API
          • Step 2: Test the API
        • Exercise 2: Delete a published API
        • Next Steps
      • Introduction to Entities
        • Fields
        • Records
        • Relations
        • Options for an Entity
        • Exercise 1: Customer Accounts and Activities
          • Customer accounts
            • Step 1: Create the Customers Entity
            • Step 2: Create the API
            • Step 3: Update entity through API
          • Customer Activities
            • Step 1: Create the Activities entity
            • Step 2: Create a “1 to Many” relation
            • Step 3: Create the API
            • Step 4: Update entity through API
        • Exercise 2: Customer Records
          • Step 1: Create the API
          • Step 2: Test the API
        • Next Steps
      • Programming with Entities
        • Create
        • Read
        • Update
        • Delete
        • JXPResponse
        • Next Steps
      • Using Triggers
        • After Create Trigger
        • After Update Trigger
        • After Delete Trigger
        • Exercise: Entity & Entity triggers
        • Step 1: Define “After Create” Trigger
        • Step 2: Define “After Update” Trigger
      • Connectors
        • Create a connector
        • SFTP Connector
        • MySQL Connector
        • Next Steps
      • Introduction to ETL pipeline
        • Create an ETL pipeline
        • Data Formats in ETL pipeline
          • Reader
          • Writer
          • Field mapping
        • Shared variables for ETL pipeline
        • ETL functions execution sequences overview
        • Displaying Functions
        • How to perform Search in ETL pipeline
        • Exercise 1: Skip Customer records
          • Step 1: Create the ETL pipeline
          • Step 2: Skip records based on Customer_ID
          • Step 3: Store skipped records in a list
          • Step 4: Store the Skipped Customer record
        • Exercise 2: ETL pipeline, CSV source & FTP Connector
        • Exercise 3: ETL pipeline, Database Source & MySQL Connector
        • Exercise 4: ETL pipeline, CSV Source & FTP Connector using Sections
          • Step 1: Create the ETL pipeline
          • Step 2: Reformat the Join_Date Values and define added fields
      • Multiple Executions, Time Duration, Linked App and Execution Status
        • Skip execution while in progress
        • Time duration settings
        • Linked App
        • Options for Delay Types
        • Execution status
      • Validation pipeline
        • Sequence of Validation pipeline
        • Exercise: Customer Information
          • Step 1: Create a Validation pipeline
          • Step 2: Create the API gateway
          • Step 3: Test the Validation pipeline
      • Introduction to Process
        • Create a process
        • Shared variables for a process
        • Exercise: Customer Anniversary Email Activity
          • Step 1: Check if the join date matches the current date
          • Step 2: Test the Process
      • Introduction to Flows & Flow components
        • What is a Flow?
        • What is a Flow component?
          • What is a Flow component Event?
        • Exercise 1: Customer Anniversary Email
          • Step 1: Create the Flow component
          • Step 2: Create the Flow
          • Step 3: Trigger the Flow
          • Step 4: Check records in the target entity
        • Exercise 2: Store list of customers
          • Step 1: Create the Flow component
          • Step 2: Create the Flow
          • Step 3: Create the API
    • 🌍Tour of Langstack (coming soon)
  • 📘In depth learning
    • 📖User Manual (coming soon)
    • 🔗Connectors
      • MS-SQL connector
        • Data type conversions between Langstack and MSSQL
        • Handling data loss in data type conversions
        • Setting up MS-SQL connector
        • MS-SQL connector as Reader and Writer
        • Using MS-SQL connector in ETL pipeline
          • MS-SQL connector as a source
          • MS-SQL connector as a destination
      • Google Drive connector
        • Set up Google Drive Connector
        • Adding Google Drive path in ETL pipeline Streams
        • Setting up GCP Account, GCP Project, API Enablement, and Credentials (Prerequisites)
          • OAuth 2.0 Client Credentials
          • Service Account Key Credentials
          • API Key Credentials
          • Authorization through Redirect URLs
        • Using Google Drive connector in ETL pipeline
          • Specifying file or folder paths
            • Direct file link
            • Folder link and file name
            • Folder path and file name
            • Folder path excluding file name
            • Folder path including file name
          • Google Drive connector as a source
          • Google Drive connector as a destination
      • AWS connector
        • Introduction
        • Set up AWS S3 Connector
          • OAuth 2.0 Client Type
          • Access Key
          • Public
        • Setting up AWS Account
          • Retrieve Client ID and Client Secret
        • Set up Amazon Web Services (Cognito) Console
          • Retrieve Identity Pool Id
          • Manage Permissions for Roles
          • Adding Redirect URL in Amazon Developer Console
          • User Consent for OAuth 2.0 Client through Login with Amazon
          • Retrieve Access Key Credentials
        • Creating a bucket in AWS
        • Using S3 connector in ETL pipeline
          • Specifying paths
          • Examples
            • AWS S3 connector as a source
            • AWS S3 connector as a destination
      • OneDrive connector
        • Set up OneDrive Connector
        • Setting up Microsoft Azure Account
        • Add URL to Authorized Redirect URLs
        • User Consent for Establishing OneDrive Connection
        • Usage of OneDrive Connector in ETL pipeline
          • Examples
          • OneDrive connector as a source
          • OneDrive connector as a destination
      • Dropbox connector
        • Set up Dropbox Connector
        • Setting up Dropbox Account
        • Add URL to Authorized Redirect URLs
        • User Consent for Establishing Dropbox Connection
        • Usage of Dropbox connector in ETL pipeline
          • Dropbox connector path settings
          • Examples
            • Dropbox connector as a source
            • Dropbox connector as destination
  • 🗃️Use Cases (Coming soon)
    • Use Case 1
    • Use Case 2
    • Use Case 3
Powered by GitBook
On this page
  1. Get started
  2. Learn Langstack

Validation pipeline

Grasp the general concepts, set up and working of the Validation pipeline with reference to Entities.

PreviousExecution statusNextSequence of Validation pipeline

Last updated 2 years ago

This section explains Validation pipelines and their usage with Langstack entities. By the end of this section, you will be able to understand fundamentals and hands-on applications of the Validation pipeline.

What is a Validation pipeline?

  • The Validation pipeline section consists of templates to create a series of checks. These checks can be performed on the data before being stored in a target entity.

  • A Validation pipeline can act as an independent unit usable in multiple Langstack applications without interfering with the logic of the Langstack application using it.

  • The validation pipeline can be edited without changing the Langstack applications associated with it. For example, suppose a Validation “Username_Acc_customers_validation” has a target entity “Username_Acc_customers”. In this case, the Validation rules can be updated without any impact on the target entity schema or the data within or any changes to the Langstack application that is using it.

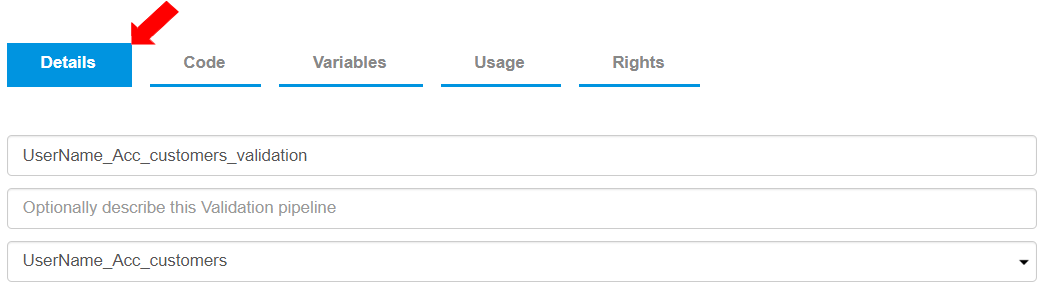
  • One Validation pipeline can have one target entity configured. In the image below, the Validation “UserName_Acc_customers_validation” has one target entity “UserName_Acc_customers”.

  • A Validation pipeline can be executed through a dedicated API gateway. This option is available to the API.

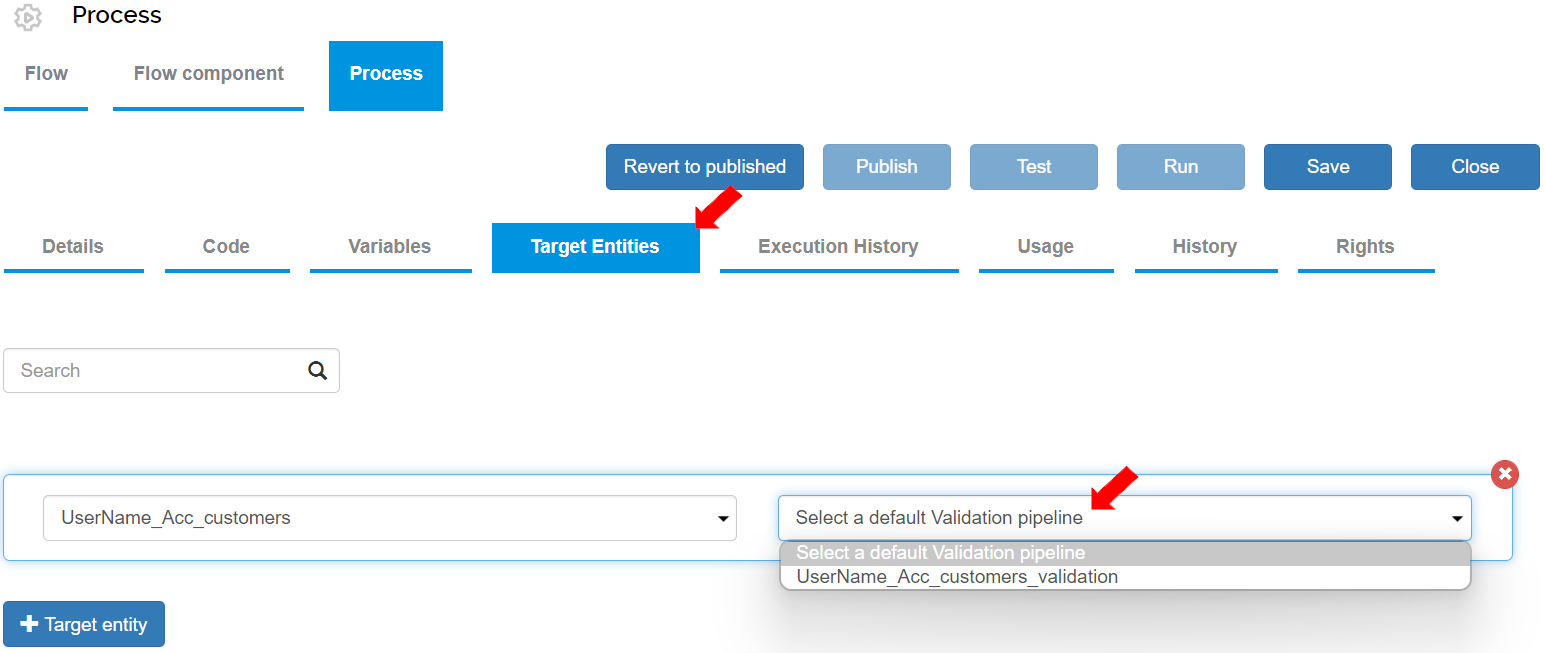
  • Other Langstack application templates working with an entity, e.g. ETL pipeline or Process, can configure the Validation pipeline in the “Target Entities” tab if a target entity is selected.

  • Multiple Validation pipelines can be created for the same entity. For example, in banking operations, loan evaluation is different between students and non-students, in such a case, a different validation can be made for students through one API gateway and another API gateway for non students. While the same API is used for both API gateways, the validation steps are different depending on the customer's profile for the loan type. The validations may be defined as follows:

    • “UserName_Acc_customers_validation”: For a customer to qualify for a student loan, required details include Name, Social Security Number, Guardian’s Name, Account Number, College Reference. Validation 1 is set for the students API gateway.

    • UserName_Acc_newcustomers_validation” For a customer to qualify for a house mortgage, required details include Name, Social Security Number, Account Number, Annual Salary. Validation 2 is set for non-students.

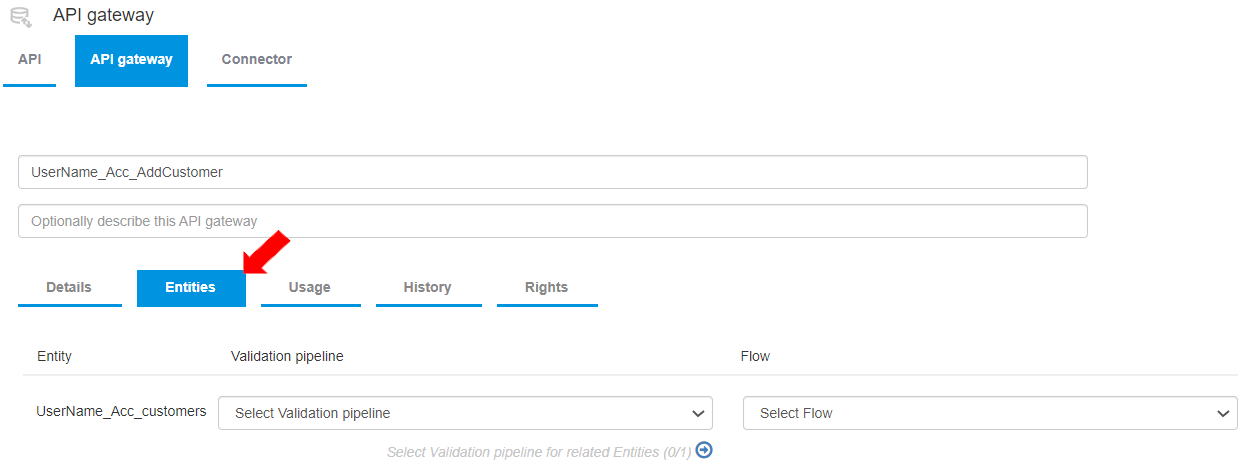
  • Target entities in Langstack applications can be linked to one Validation pipeline, however, the user can choose in the API>Target Entities tab not to invoke the linked Validation pipeline.

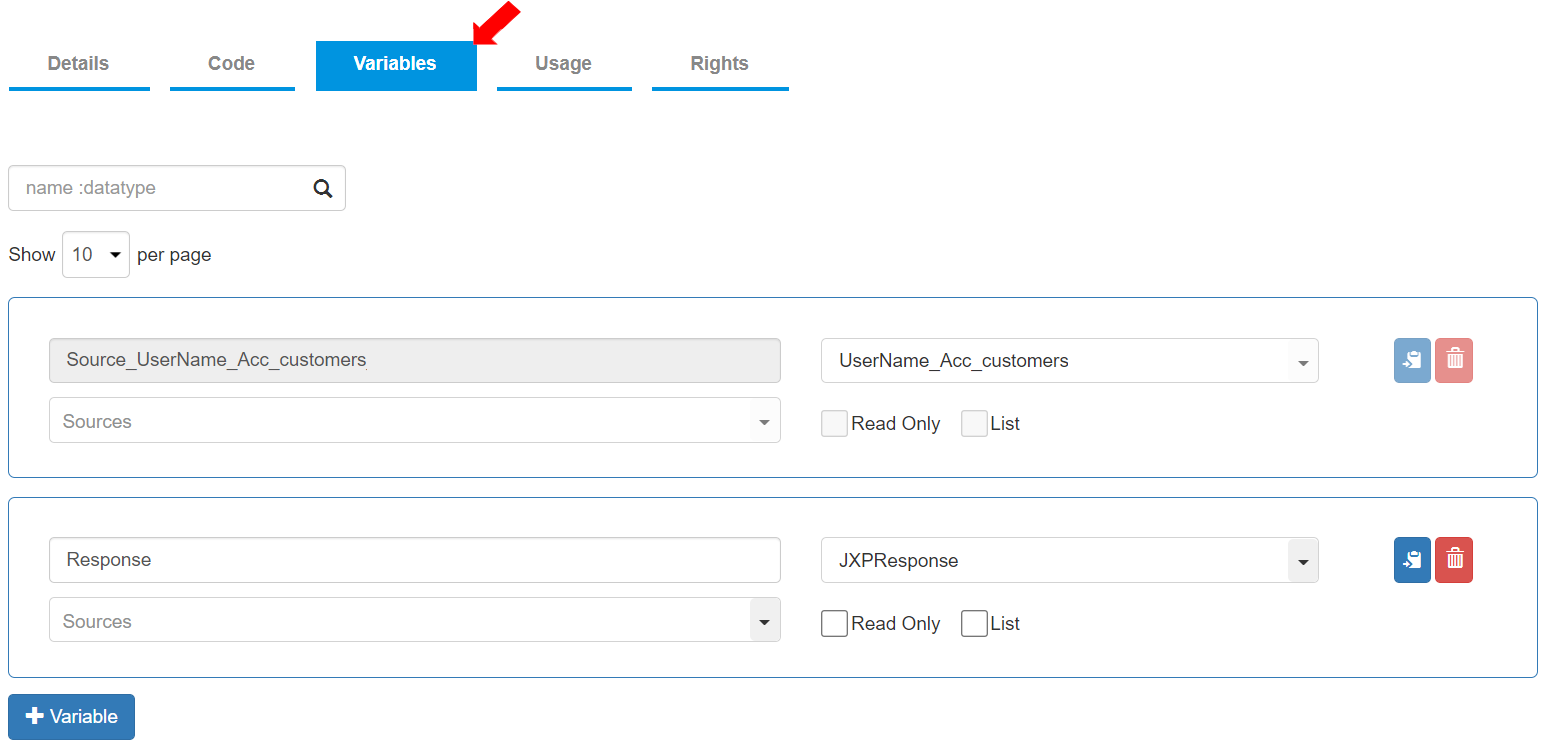
  • To view the shared variables for this Validation pipeline, go to Variables. Two (2) variables are defined automatically on the creation of this validation:

    • Variable Name: “Source_UserName_Acc_customers”, Data Type: “UserName_Acc_customers” The variable name is automatically defined by the convention {Source_(target_entity_name)} and the data type is the entity itself. This variable contains the information to be validated and added to the entity as a source. For example, the API application sends the information of a record to the Validation pipeline, and that record sent to the Validation pipeline becomes the source.

    • Variable Name: “Response”, Data Type: “JXPResponse” This variable contains the response to be sent to the Action that attempted the creation or updating the Entity record, This response is in terms of success or failure of the Validation result.

  • To define the Actions, go to the “Code” tab of the Validation pipeline. On creating a new Validation pipeline, the system automatically creates all relevant Actions and their descriptions for all functions.

During Validation pipeline execution, this section will be executed after initialization of the Variables.

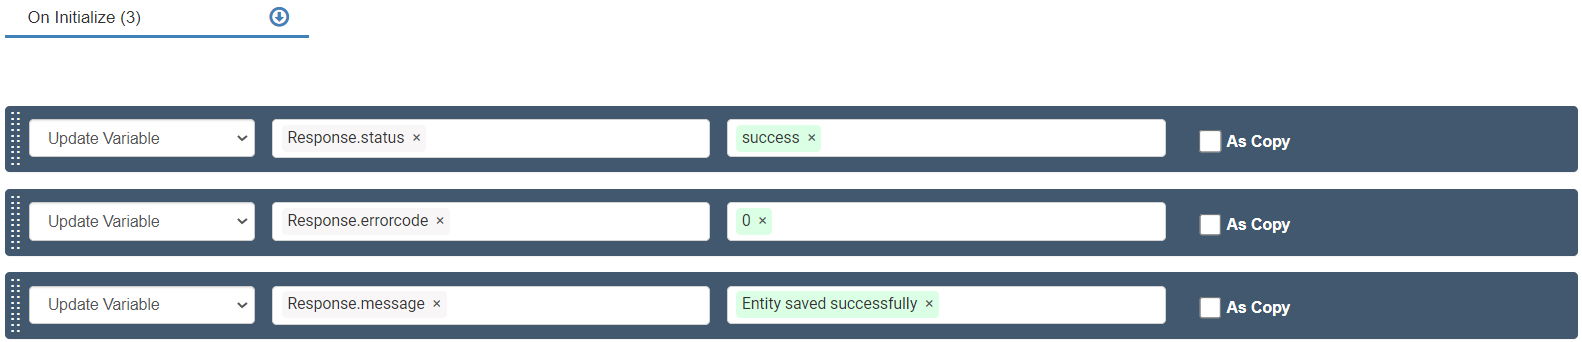
  • In the On Initialize function, a sequence of actions is already defined, which is executed when the validation is to be initialized. The Response object (which is of type JXPResponse) is initialized with successful response details. (This means that if the validation did not encounter invalid data during validation, it will respond with success.) The On Initialize function looks as per the image below.

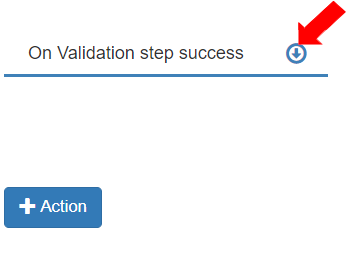
  • The “On Validation step success” function is empty.

  • The “On Validation step fail” function is automatically configured to set the response status as “failed”.

  • The “On Error” function is automatically configured to set the response status as “failed”.

  • The “On Exit” function is automatically configured to send the Response.

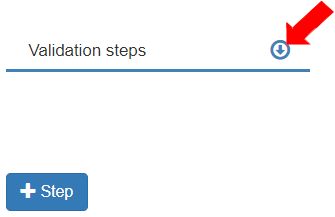
  • When the Code>On Initialize function is executed, then the Validation steps function is executed. Steps in Validation are similar to Action boxes in API and other templates.

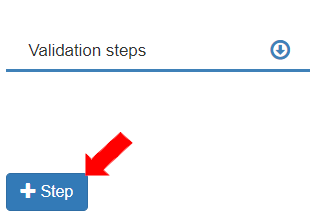
  • The Validation pipeline consists of a sequence of Validation Steps. To create a Validation Step, click the [+ Step] button in the Validation steps function.

  • A Validation Step in a Validation pipeline is similar to an “Action box”. A Step has a description field and three (3) tabs: Criteria, Code, and Variables.

  • Criteria tab: Users need to define a criteria in the Step. For each Step, at least one Criteria bar must exist in the Criteria tab to determine which section is to be executed in the Code tab.

  • Code tab: The sequence of executing the functions is as follows:

    • On Initialize function: the actions defined here are executed when the Step is initialized and before evaluating the criteria found in the Criteria tab and after all the variables defined in the step are initialized.

    • On Validation step success function: the actions defined in this section are executed when the criteria in the Step is evaluated true.

    • On Validation step fail function: the actions defined in this section are executed when the criteria in the Step is evaluated false.

    • On Error function: the actions defined in this section are executed when an error is encountered during the execution of On Initialize, On Validation step success or On Validation step fail, e.g. when mandatory information is invalid.

  • Variables: the variables defined in the Step>Code tab are initialized before any action or evaluation of the criteria is performed.

  • When any Langstack application that associates a Validation pipeline to a Target Entity and attempts to create or update an Entity record in it, the data of the Entity record is passed to the Validation pipeline and becomes the data source for the Validation pipeline. This data is stored in the form of an Entity variable type and is defined in the shared variables with the name Source_{Entity type name}.

  • To exit Validation Steps, use the Exit validation Action which can exit with either true or false.

  • If the Validation pipeline returns false, the create or Update Entity record operation will not be performed.

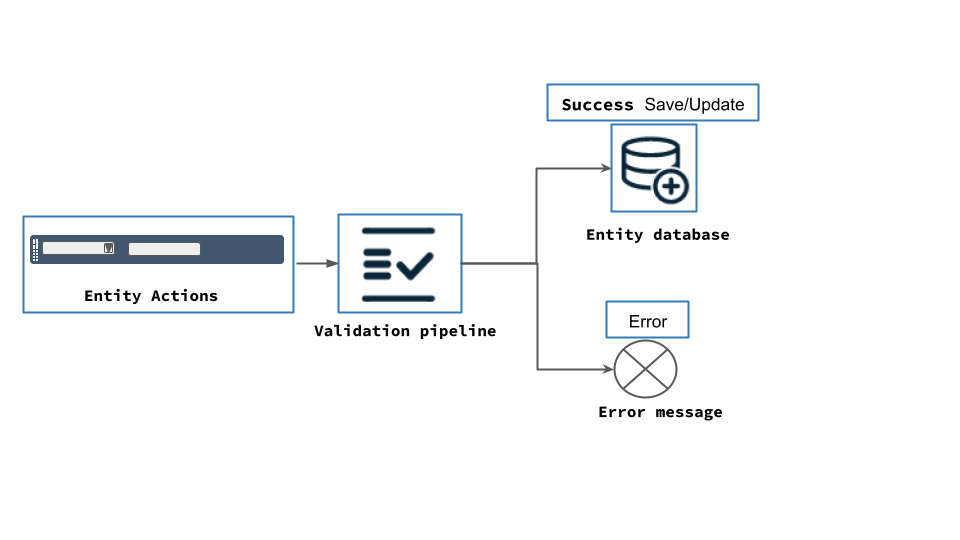
  • If the Validation pipeline returns true, this indicates a successful Validation pipeline status. Any changes to values of the entity record fields in the Validation pipeline will be included in the updated or created record. The image below shows effects of the Validation Pipeline result on the entity record.

💡
📕