> For the complete documentation index, see [llms.txt](https://docs.langstack.com/welcome/llms.txt). Markdown versions of documentation pages are available by appending `.md` to page URLs; this page is available as [Markdown](https://docs.langstack.com/welcome/get-started/learn-langstack/introduction-to-etl-pipeline/exercise-1-skip-customer-records/step-1-create-the-etl-pipeline.md).
# Step 1: Create the ETL pipeline
The first step is to create an ETL pipeline.
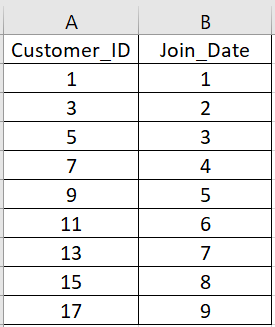
* For this exercise, use a CSV file with the following fields:\
Customer\_ID, Join\_Date
* Open Filezilla (or any FTP/SFTP) utility tool and connect to the remote site.
* Place the CSV file in the connecting remote site.
* To go to the ETL pipeline template, click on “ETL pipeline” under the “Data management” menu on the left side panel.
* To create a new ETL pipeline, click the \[+ ETL pipeline] button under the “ETL pipeline” tab.
* To label the ETL pipeline and execution log entity, add the following information:
1. Enter the “ETL pipeline” name as “UserName\_Acc\_customers”.
2. Optionally add a description for this ETL pipeline.
3. Enter a name for the execution log for this ETL pipeline as “csvtoentity”. This log will be updated each time the ETL pipeline is executed and can be viewed by clicking “Go to records”.
* To connect to the data source, add the necessary information in the “Data Source” function. To add an existing connector:
1. Select the “Connector” tab.
2. Select the relevant connector source. In this exercise, “Tutorial\_SFTP” is selected. (The source can be selected from the drop-down menu or a new source can be added by clicking the \[+] button and adding relevant details.)
3. To edit the settings, click the “Edit the settings” arrow. In the settings, to add or update the details for the FTP/SFTP Connector, update the required fields ([click here for the steps](/welcome/get-started/learn-langstack/connectors/sftp-connector.md)).\
\
If a connector does not exist, to create a new connector In the Data Source in the ETL pipeline, click the \[+] button and add the required fields.
* To add the necessary details to connect with the data destination, in the “Data Destination” section:
1. Select the “Entity” tab.
2. Select destination as “UserName\_Acc\_skipCustomers”.
* To disallow multiple simultaneous runs of the ETL pipeline leave the toggle button enabled for “skip execution while in progress”.\
Enabling this toggle button defines that the execution of this ETL pipeline will be skipped when there is one already in progress.
* The default value for ETL pipeline execution is selected as “Immediate”. For this exercise, keep it as is.
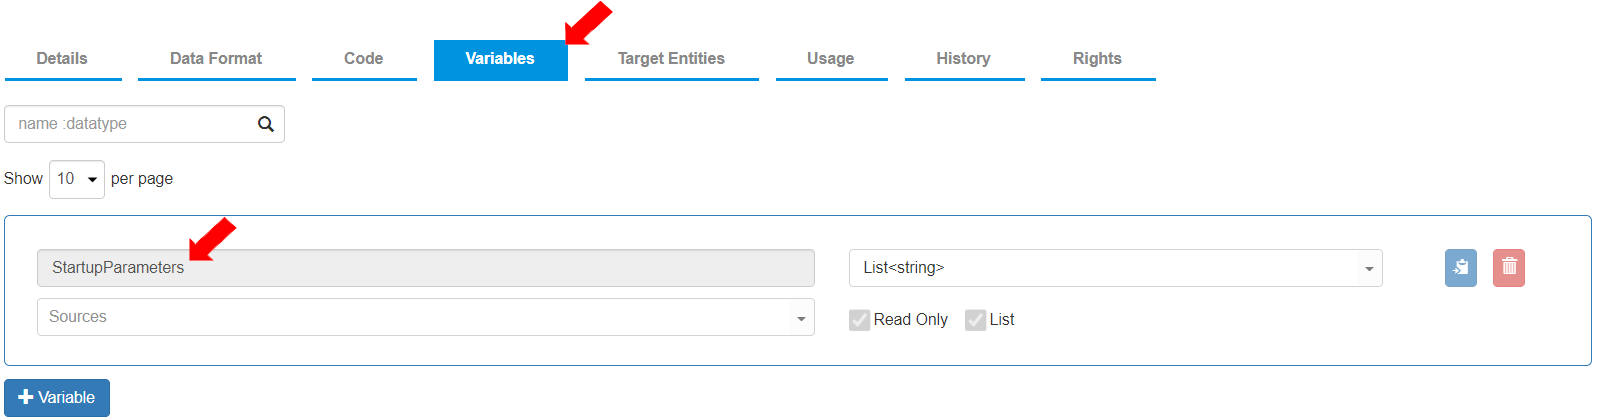
* To define the shared variables, go to the “Variables” tab.\
The “Variables” tab consists of the shared variable “StartupParameters” with the data type as “List”. To add the variables for Actions to use, create the following additional three shared variables by clicking the \[+ Variable] button.
* These variables will cover the scope of all the sections in the ETL pipeline.
* To store the the value for the joining month, define the following variable:\
Variable name: “defJoinMonth”, Data Type: “integer”, Initialized value: “3”
* To store the the value for the joining day, define the following variable:\
Variable name: “defJoinDay”, Data Type: integer, Not initialized
* To store the the value for the complete joining date, define the following variable:\
Variable name: “joinedDate”, Data Type: DateTime, Not initialized
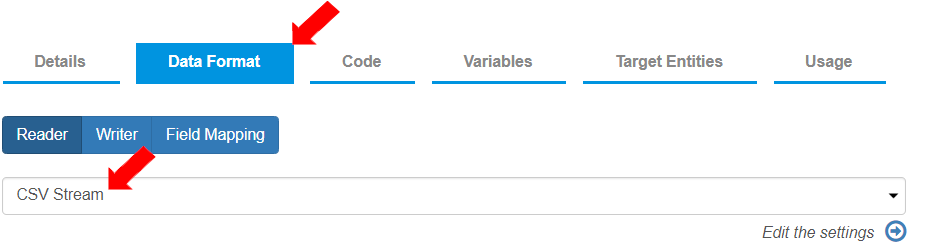
* To define the Reader (reading from the source) and Writer (writing on the destination) settings, go to the “Data Format” tab.\
To define the stream, select “Reader Stream” as “CSV Stream”.
* To define the settings for the “CSV Stream”, click on the “Edit the settings” arrow to add details for the “Reader stream”.
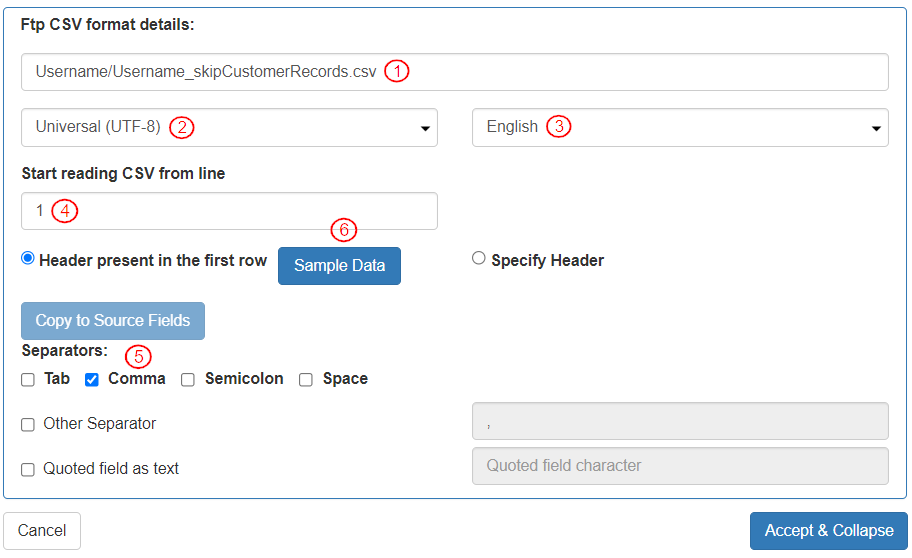
* “FTP CSV Format Details” box will be displayed.\
To define the “FTP CSV format details” settings, add the following details:
1. Add the exact file path. This is the path to the file from which the CSV data will be read.
2. Select “Character Set” as “Universal (UTF-8)”.
3. Select “Language” as “English”.
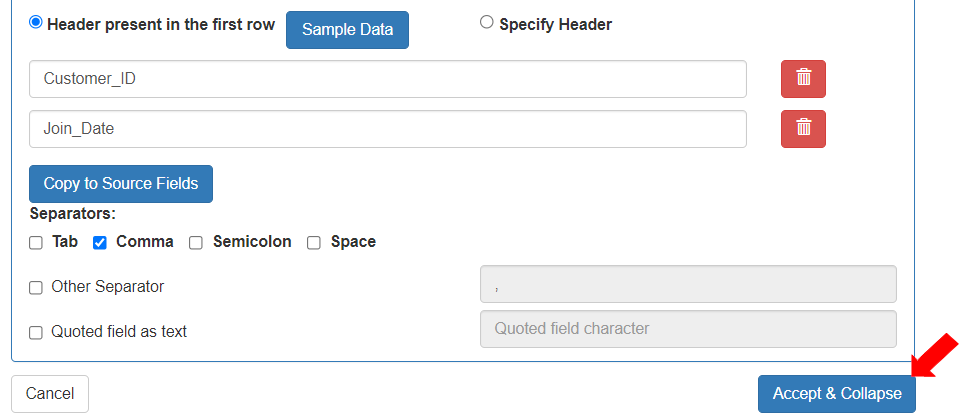
4. To define that the data is read from the first row, in the “Start reading CSV from line” field, enter the digit “1”. The field “Header present in the first row” is selected by default.
5. To define the separator based on which the fields are distinguished, select Separator as “Comma”.
6. The \[Sample Data] button gets activated. To define the sample entity fields, click the \[Sample Data] button.
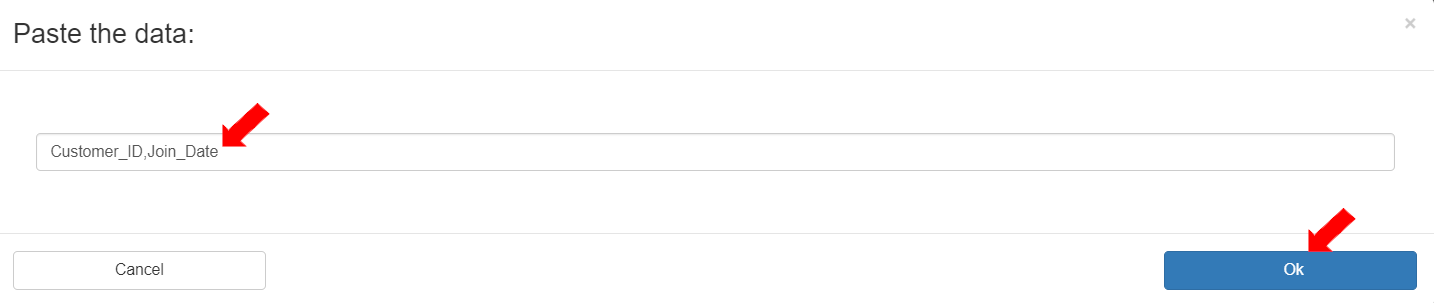
* When the \[Sample Data]button is clicked, a box will be displayed to add the header file sample that is in the CSV file. Add the header file sample as follows:\
`Customer_ID,Join_Date`
\
The header sample will contain the details of the fields to be read from the target Entity.\
To save the sample, click the \[OK] button.
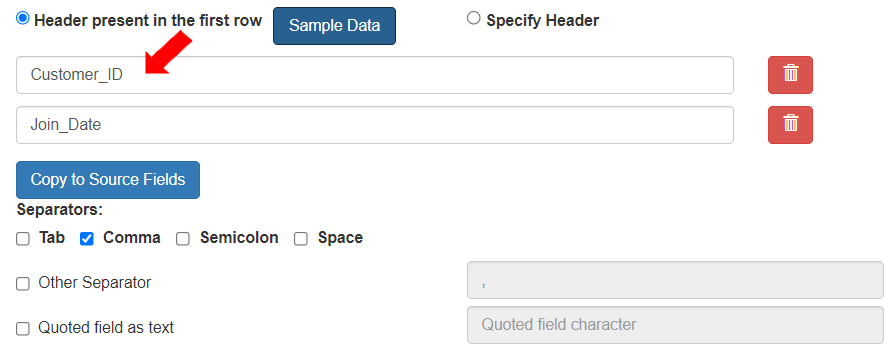
* The fields of the entity will be displayed (based on the sample data entered).
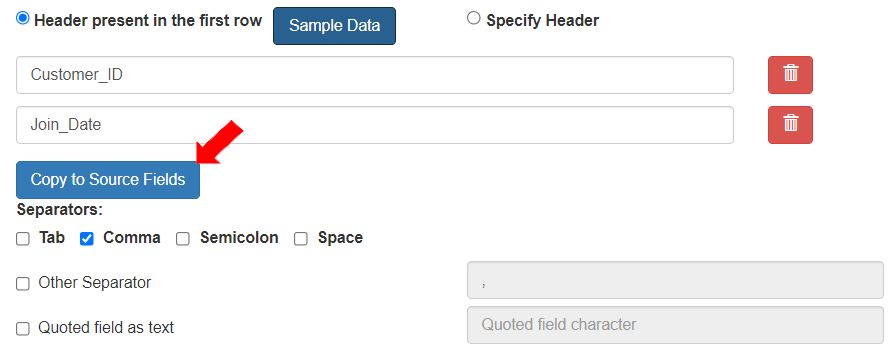
* To copy the CSV fields to Source fields in the entity, click the activated \[Copy Sample to Source Fields] button.
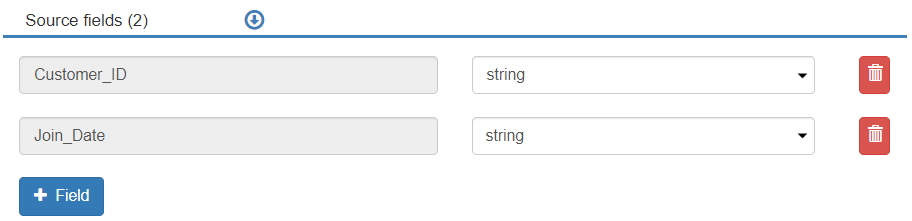
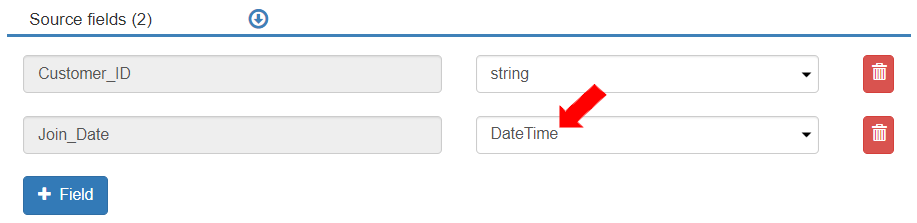
* The fields will be populated with string data types in the Source Fields section.
* Update the data type for the “Join\_Date” field to DateTime (as per the field's data type in the destination entity).
* To accept the Ftp CSV format details settings, click the \[Accept & Collapse] button.
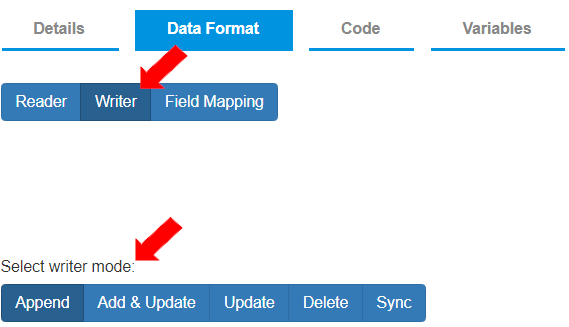
* After the “Reader” settings are defined, to define “Writer” settings, select the Data Format>Writer tab.\
To define that the data is written to the destination as mentioned in reader source fields without transforming it, select “Writer Mode” as “Append”.
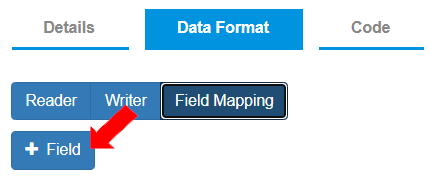
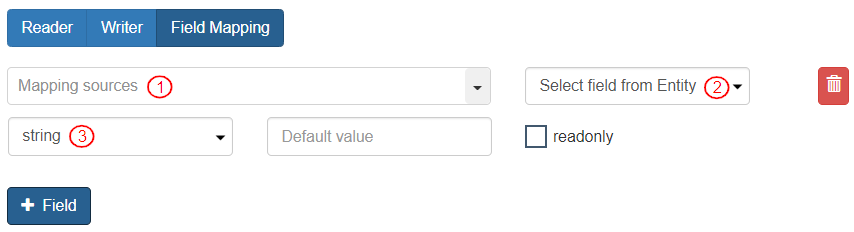
* To map the reader source fields to the entity destination fields, select the “Field Mapping” tab.\
To add the Mapped Fields, click the \[+ Field] button and add relevant information.
* In case of CSV files, the sequence of fields top-down must be exactly the same as the sequence specified in the Reader.
1. Mapping Sources: Select the field specified in the Reader. Select Variables>Reader>(field name). It displays as “reader.(Field Name)”.
2. Select field from Entity: Select mapping field from the Entity.
3. Data Type: Select the data type for the mapping fields.
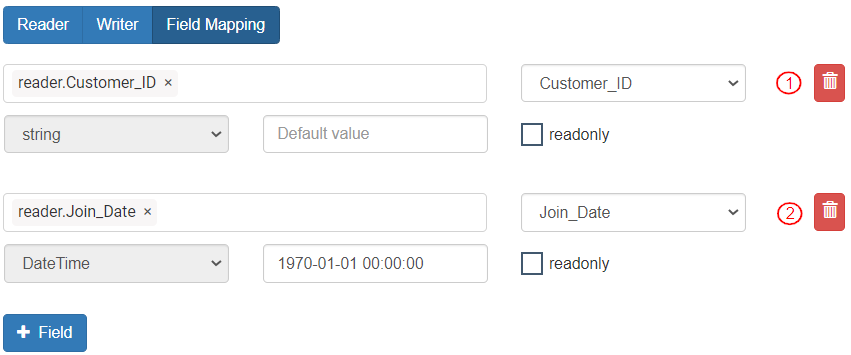
* Add both the required fields in the “Field Mapping” section.
1. The Customer\_ID field contains the odd numbers from 1 to 17 and is mapped to the target entity field “Customer\_ID”.
2. The “Join\_Date” contains only the value for the day in the date and is mapped to a Shared variable “joinedDate” of data type DateTime that is not initialized. (When a DateTime variable is not initialized to any value, it picks up the default date of “1970–01-01 00:00:00”.)
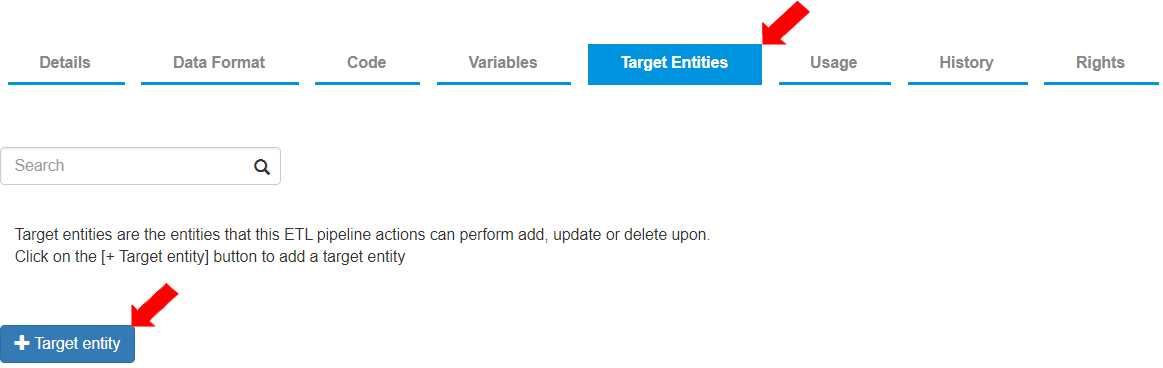
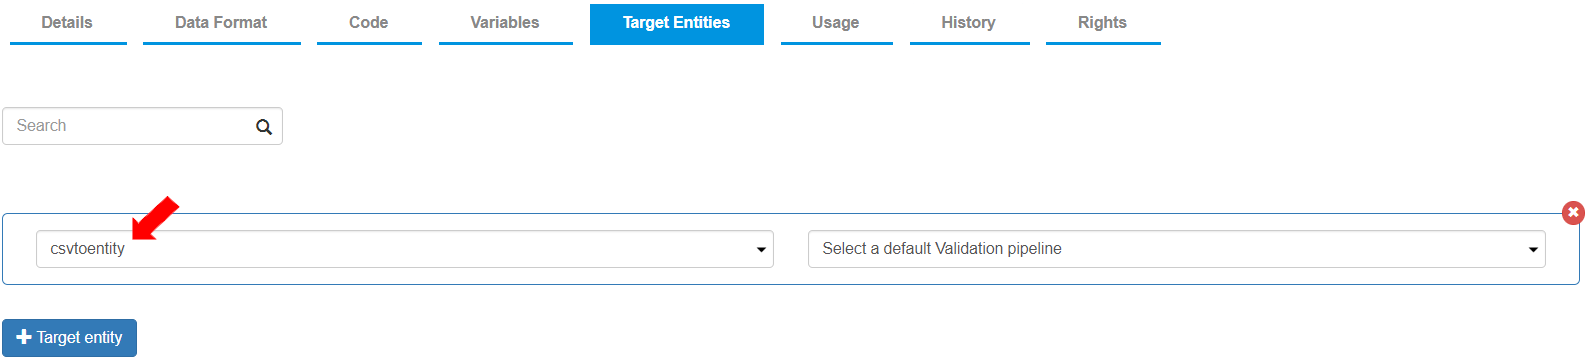
* To add a target entity, go to the Target Entities tab and click \[+ Target entity].
* Select the entity “csvtoentity”.