> For the complete documentation index, see [llms.txt](https://docs.langstack.com/welcome/llms.txt). Markdown versions of documentation pages are available by appending `.md` to page URLs; this page is available as [Markdown](https://docs.langstack.com/welcome/get-started/learn-langstack/introduction-to-etl-pipeline/exercise-4-etl-pipeline-csv-source-and-ftp-connector-using-sections/step-2-reformat-the-join_date-values-and-define-added-fields.md).
# Step 2: Reformat the Join\_Date Values and define added fields
The joining date for the customer in this file is in the format (M/DD/YYYY), whereas the format of the Join\_Date in the entity is (MM/DD/YYYY). The date format must be reformatted before storing it in the entity.\
The second step of this exercise is
1. Reformat the Join\_Date values.
2. Assign values to the added fields (DateMonthJoinDate, Customer\_Value, and Rating).
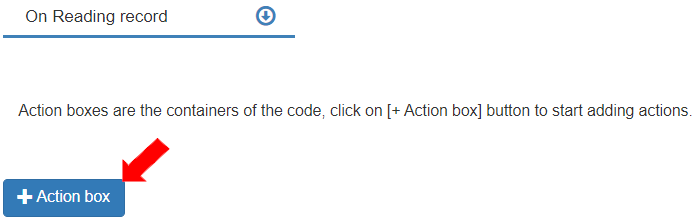
* To define the actions, go to the Code tab>On Reading record function and expand it.\
To add an “Action box”, click the \[+ Action box] button.
* In this Action box, the format of the join date will be aligned to the format of the destination entity. To give it a more meaningful label, click on the text and enter the text as “fix join date field”.
* To define the variables to store values in this Action box, go to the “Variables” tab and add a new variable by clicking the \[+ Variable] button.
* To store the “Join\_Date” value in the Reader as string before reformatting it, define the first variable as follows:\
Variable name: “strList”, Data Type: “string”, Select the “\[List]” checkbox.\
It displays as “List”. This defines the variable to store a list of strings.
* To store the value of the Day from the “Join\_Date”, add and define the second variable as follows:\
Variable name: “strDay”, Data Type: “string”
* To store the value of the Month from the “Join\_Date”, add and define the third variable as follows: Variable name: “strMonth”, Data Type: “string”
* To store the value of the Year from the “Join\_Date”, add and define the fourth variable as follows:\
Variable name: “strYear”, Data Type: “string”
* To store the value of the adjusted DateTime of the “Join\_Date”, add and define the last variable of the “Action box” as follows:\
Variable name: “adjustedDateTime”, Data Type: “string”
* To define the actions in the “Action box”, go to the “Code” tab and add an Action.
* To define the action to store the Join\_Date as a list of strings:
1. Select Action as “Split string”.
2. Select Target Value as “strList”.
3. Select Source as Variables>reader>Join\_Date. It displays as “reader.Join\_Date”.
4. Enter Delimiter as “/” (without quotes). (the date format in the source file is “d/mm/yyyy hh:mm:ss”, hence, the list will be created by separating the digits based on the “/”)
* To update the month's value (first part of the list of strings) into a variable, add and define the second Action as follows:
1. Select Action as “Update Variable”.
2. Select Target Value as “strMonth”.
3. Select Value as Variables>strList>getFirst(). It displays as “strList.getFirst()”.
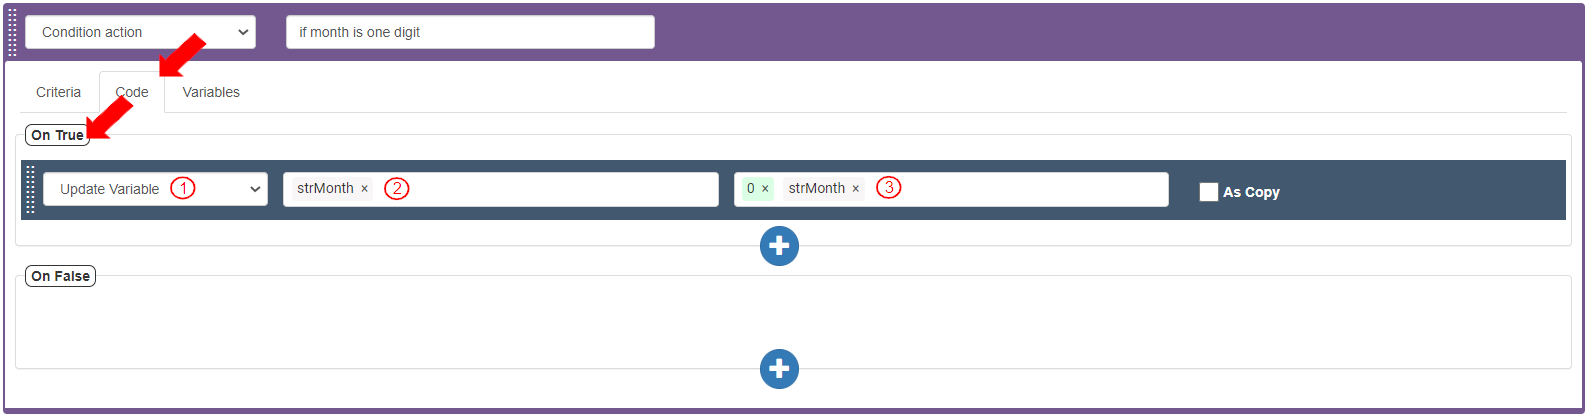
* To update the format of the “strMonth” value to align it with that of the “Join\_Date” in the entity, i.e., convert the format from “m/” to “mm/”, add and define the third Action:
1. Select Action as “Condition action”.
2. Enter the description as “if month is one digit”.
* To define the criteria, go to the “Criteria” tab in the “Condition action” and add a new Criteria bar.
* Define the Criteria bar to check the value of “strMonth” is less than 2 digits:
1. Select Source as Variables>strMonth>length(). It displays as “strMonth.length()”.
2. Select Operator as “Is Equal”.
3. Enter Integer value as “1” and press Enter.
* To define the action if the Criteria Bar returns true, go to the Code tab>On True section.\
Add and define the action to update the “strMonth” variable with a “0” placed before the value:
1. Select Action as “Update Variable”.
2. Select Target Value as “strMonth”.
3. Select Source as follows to concatenate the “0” with the value of “strMonth”:
1. Enter the digit “0” (without quotes) and press Enter.
2. Select Variables>strMonth. The source field displays as “0”“strMonth”.
* To store the second item of list of strings (day's value) in the variable “strDay”, add and define an action after the “Condition action” as follows:
1. Select Action as “Get List item”.
2. Select Target Value as “strDay”.
3. Select Source as Variables>strList. It displays as “strList”.
4. Enter the index position as “1” (without quotes) and press Enter.
* To update the format of the “strDay”value to align it with that of the “Join\_Date” in the entity i.e convert the format from “d/” to “dd/”, add and define the third action:
1. Select Action as “Condition action”.
2. Enter the description as “if day is one digit”.
* To define the criteria for the “Condition action”, go to the “Criteria” tab in the “Condition action” and add a new Criteria bar.
* Define the Criteria bar to check the value of “strDay” is less than 2 digits:
1. Select Source as Variables>strDay>length(). It displays as “strDay.length()”.
2. Select Operator as “Is Equal”.
3. Enter Integer value as “1” and press Enter.
* To define the action if the Criteria bar returns true, go to the Code tab>On True section, add and define the action to update the “strDay” variable with a “0” placed before the value:
1. Select Action as “Update Variable”.
2. Select Target Value as “strDay”.
3. Select Value as follows to concatenate the “0” with the value of “strDay”:
1. Enter the digit “0” (without quotes) and press Enter.
2. Select Variables>strDay. It displays as “strDay”.\
The source field displays as “0”“strDay”.
* To separate values of the year and time, the last part of the first list of strings needs to be split further. After the Condition action, add and define the Action as follows:
1. Select Action as “Split string”.
2. Select Target Value as “strList”.
3. Select the Source as Variables>strList>getLast(). It displays as “strList.getLast()”.
4. Enter the Delimiter as “ ” (space without quotes). (The list of strings to split is the last part of the first string i.e. “yyyy hh:mm:ss”, hence, the list of strings will be created by separating the values based on the “(space)”.)
* To update the year's value (first part of the list of strings created in the previous step) into a variable, add and define the second action as follows:
1. Select Action as “Update Variable”.
2. Select Target Value as “strYear”.
3. Select the Value as Variables>strList>getFirst(). It displays as “strList.getFirst()”.
* To update the values of day, month and year in the Join\_Date read by the Reader into the format of the Join\_Date field in the entity (yyyy-mm-dd hh:mm:ss), add and define an Action as follows:
1. Select Action as “Update Variable”.
2. Select Target Value as reader>Join\_Date(). It displays as “reader.Join\_Date()”.
3. Select Value as follows:
1. Select Variables>strYear. It displays as “strYear”.
2. Type “-” (without quotes) and press Enter.
3. Select Variables>strMonth. It displays as “strMonth”.
4. Type “-” (without quotes) and press Enter.
5. Select Variables>strDay. It displays as “strDay”.
6. Type “(space)” (without quotes) and press Enter.
7. Type “00-00-00” (without quotes) and press Enter.\
\
The Source value displays as “strYear”“-”“strMonth”“-”“strDay”“(space)”“00-00-00”
* To update the values of the Day and Month in the reader field of “DayMonthJoinDate”, add and define an Action as follows:
1. Select Action as “Update Variable”.
2. Select Target Value as reader>DayMonthJoinDate().
3. Select Value as follows:
* Select Variables>strDay. It displays as “strDay”.
* Select Variables>strMonth. It displays as “strMonth”.
The Source value displays as “strDay”“strMonth”.
* To assign a value to “Customer\_Value” field added to the Reader, add and define an Action as follows:
1. Select Action as “Update Variable”.
2. Select Target Value as reader>Customer\_Value. It displays as “reader.Customer\_Value”.
3. Type the Value as “0” and press Enter.
* To assign a value to “Rating” field added to the Reader, add and define an Action as follows:
1. Select Action as “Update Variable”.
2. Select Target Value as reader>Rating. It displays as “reader.Rating”.
3. Type the Value as “1” and press Enter.
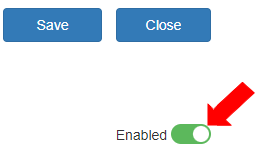
* To save the ETL pipeline, click \[Save].
* To publish the ETL pipeline, click \[Publish].
* Ensure the ETL pipeline is enabled.
*
```
```
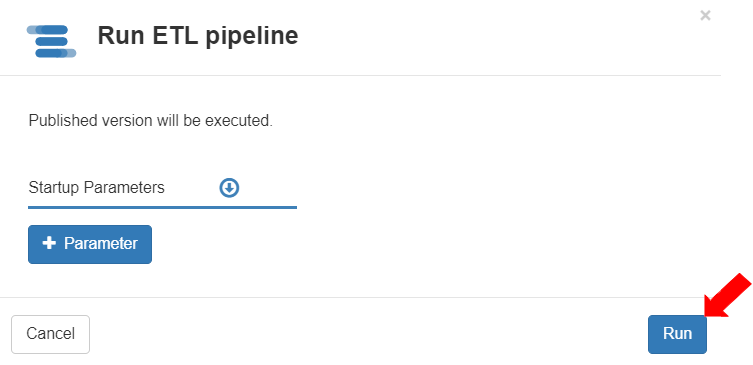
* Click the \[Run] button.
* The Run ETL pipeline dialog box displays. Click \[Run] to execute the ETL pipeline.
* The ETL pipeline will run on the date and time specified. The records will be added to the destination file.
* The data will be updated from the source to destination. To verify, check the target entity. The data from the file will be updated in the target entity along with the added fields for DayMonthJoinDate, Customer\_Value, and Rating.
---
# Agent Instructions
This documentation is published with GitBook. GitBook is the documentation platform designed so that both humans and AI agents can read, navigate, and reason over technical content effectively. Learn more at gitbook.com.
## Querying This Documentation
If you need additional information that is not directly available in this page, you can query the documentation dynamically by asking a question.
Perform an HTTP GET request on the current page URL with the `ask` query parameter, and the optional `goal` query parameter:
```
GET https://docs.langstack.com/welcome/get-started/learn-langstack/introduction-to-etl-pipeline/exercise-4-etl-pipeline-csv-source-and-ftp-connector-using-sections/step-2-reformat-the-join_date-values-and-define-added-fields.md?ask=&goal=
```
`ask` is the immediate question: it should be specific, self-contained, and written in natural language.
`goal` is optional and describes the broader end goal you are ultimately trying to accomplish on behalf of the user. GitBook uses it to tailor the answer towards what is most useful for that goal.
The response will contain a direct answer to the question and relevant excerpts and sources from the documentation.
Use this mechanism when the answer is not explicitly present in the current page, you need clarification or additional context, or you want to retrieve related documentation sections.