# Step 2: Create the Flow
The second step is to configure a Flow, which will execute the Flow component twice. This Flow will be designed in the following sequence:

1. The target entity is selected. (Target Entity)
2. When the entity is loaded, the Flow is qualified. (Qualified) The Flow component “ActivityEmailSender” is called first.
3. User enters information of the relevant fields through Field Mapping and a record is created in the target entity. (Activity)
4. The customer anniversary congratulations email is sent. (Event)
5. When the first email is sent, a delay is called. For this exercise, the delay is configured to be two (2) minutes. (Delay)
6. The time has elapsed. (Event)
7. The Flow component “ActivityEmailSender” is called the second time. User enters information of the relevant fields through Field Mapping and a record is created in the target entity. (Activity)
To create the Flow, proceed with the following steps:
* To go to the Flows section, click “Flow” under the “Background processes” menu on the left side panel.
*
```
```
* To create a new Flow, click the \[+ Flow] button.
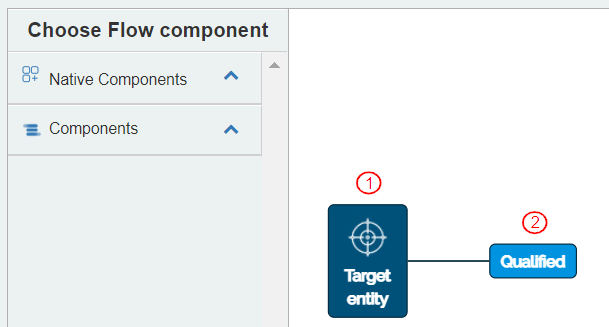
* A new Flow is displayed with the following icons: “Target Entity” “Qualified” \
This indicates that the creation of Flow is qualified or enabled only when the Target Entity is present.
*
```
```
* To define the Flow, add the following details:
1. Enter the Flow name as “CustomerActivityCreated”. The name indicates that when this Flow is triggered, a customer activity is created.
2. Optionally add a description for the Flow.
3. To define the target entity, select the entity “UserName\_Acc\_Activities” from the drop down menu. This defines that the customer activity record will be created in the entity “UserName\_Acc\_Activities”.
4. To define an entity to store the logs for this Flow, select or add “Flow Progression Entity”. This entity contains the logs for the execution of this Flow. The user can select an existing entity or create one by clicking the \[+] button. \
Label it as “UserName\_flowApp\_progression”.
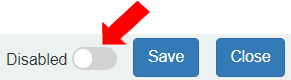
* The Flow is disabled by default. When the Flow is being configured or updated, it needs to stay disabled by clicking the toggle button. It can be enabled after completing the Flow configuration before executing the Flow.
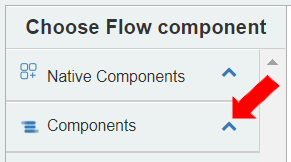
* To add the Flow component “ActivityEmailSender”, click “Components” on the left side panel. It lists the user defined Flow components.
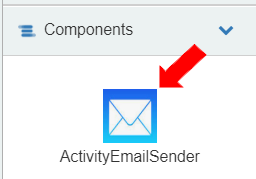
* The Flow component “ActivityEmailSender” is displayed with the icon configured in Step 1 of this exercise.
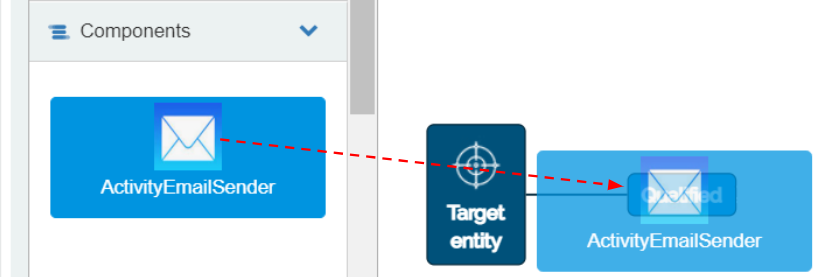
* To place the Flow component as the first activity to be placed in the Flow after Qualified, click on the “ActivityEmailSender” Flow component and drag it on to the “Qualified” icon.
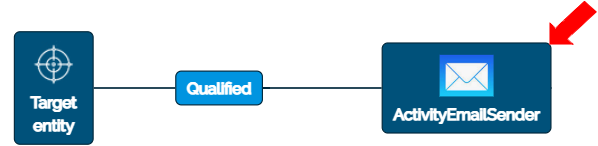
* The “ActivityEmailSender” Flow component automatically gets placed to the right side of the “Qualified” icon connected with a line.
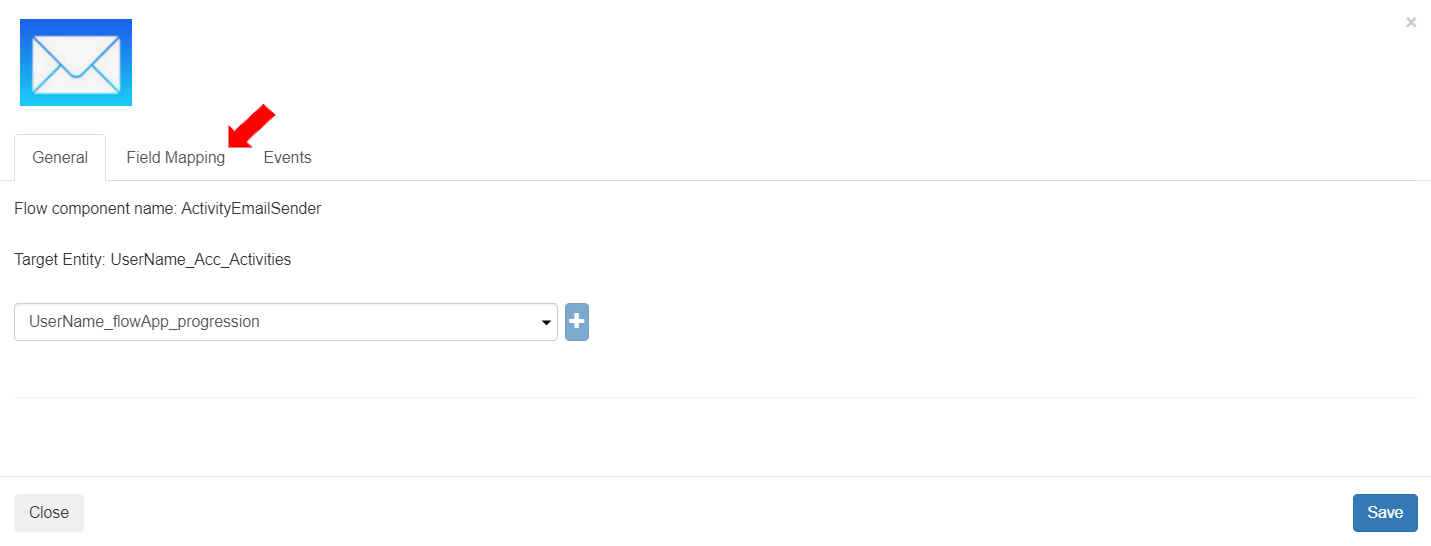
* To define the Mapped Fields and view the Events for the Flow component, click on “ActivityEmailSender” Flow component. A dialogue box displays with the General tab selected by default. \
Click on the “Field Mapping” tab.
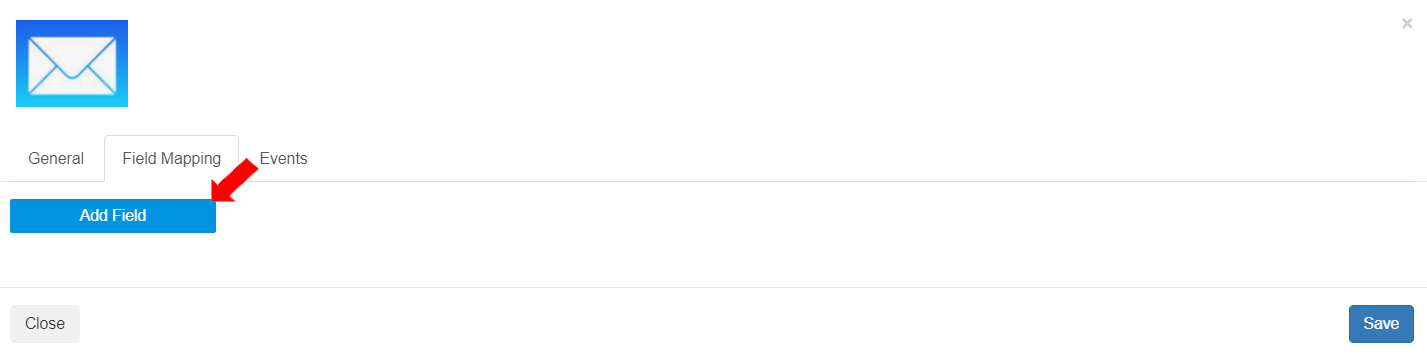
* In this section, the user can configure the Mapping Fields created in Step 1 (Flow component>Details tab). The values entered or selected in this field will be stored as the values of the entity field in the anniversary email record.
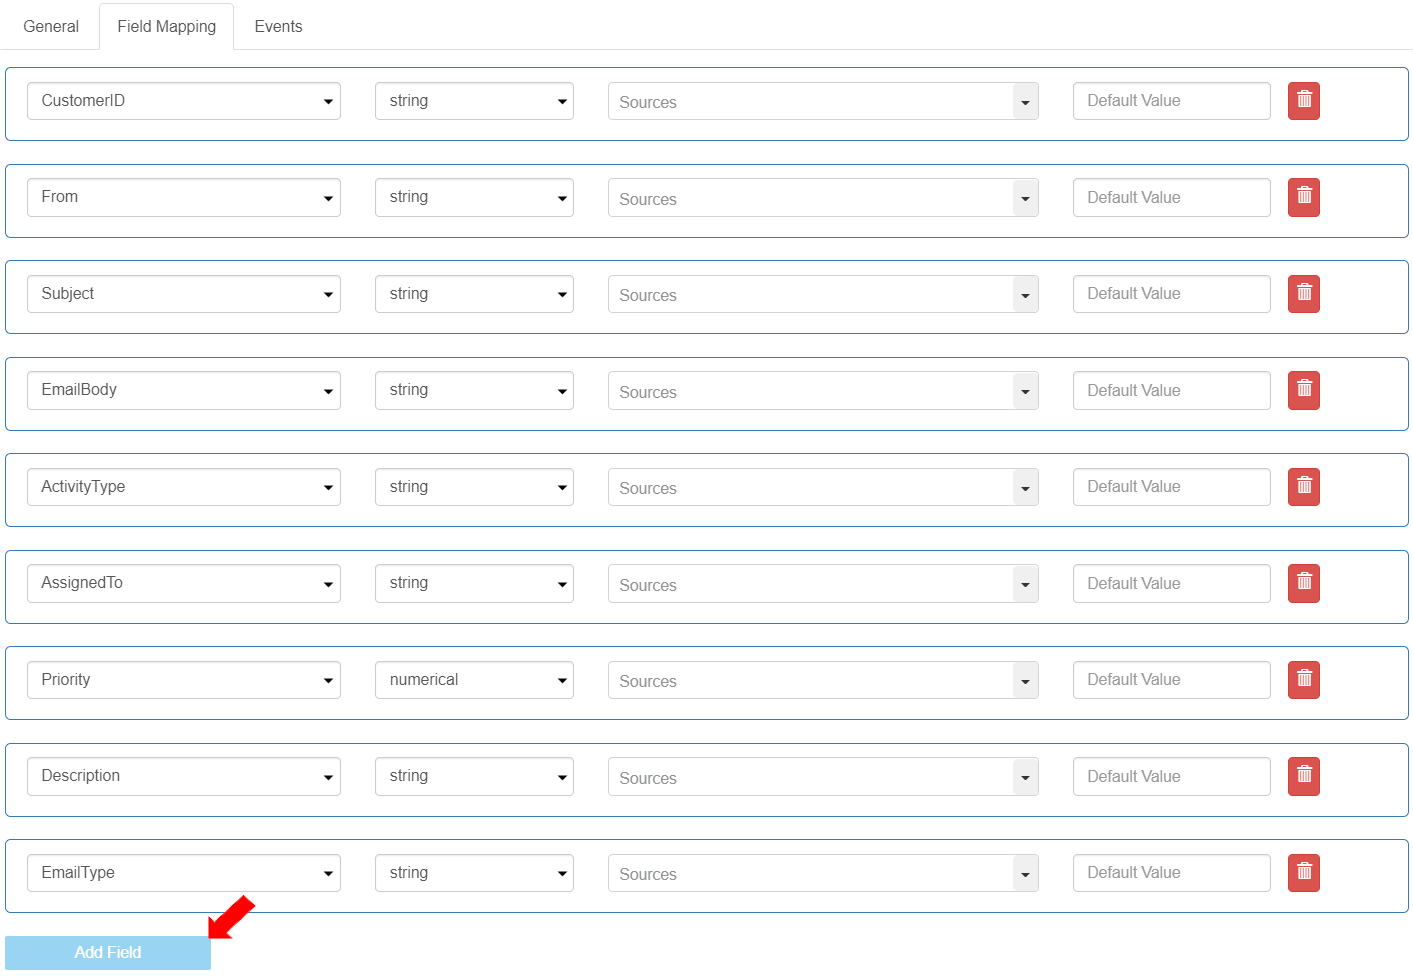
* To add a new field, click the \[Add Field] button.
* The first Mapped Field displays with the name as “CustomerID” and data type as String (as defined in Step 1 Details>Field Mapping section).
* To add all the Mapped Fields of the Flow component, click the \[Add Field] button nine (9) times (for the nine mapped fields). \
Each time the \[Add Field] button is clicked, the Mapped Fields will appear in the same order as the Mapped Fields defined in the Flow component>Details>Field Mapping section. When all the fields are added, the \[Add Field] button gets inactivated.
* To enter the details of the email record, define the sources (or constant text) for each field. \
The values added in these fields will be updated as the first record in the target entity. \
\
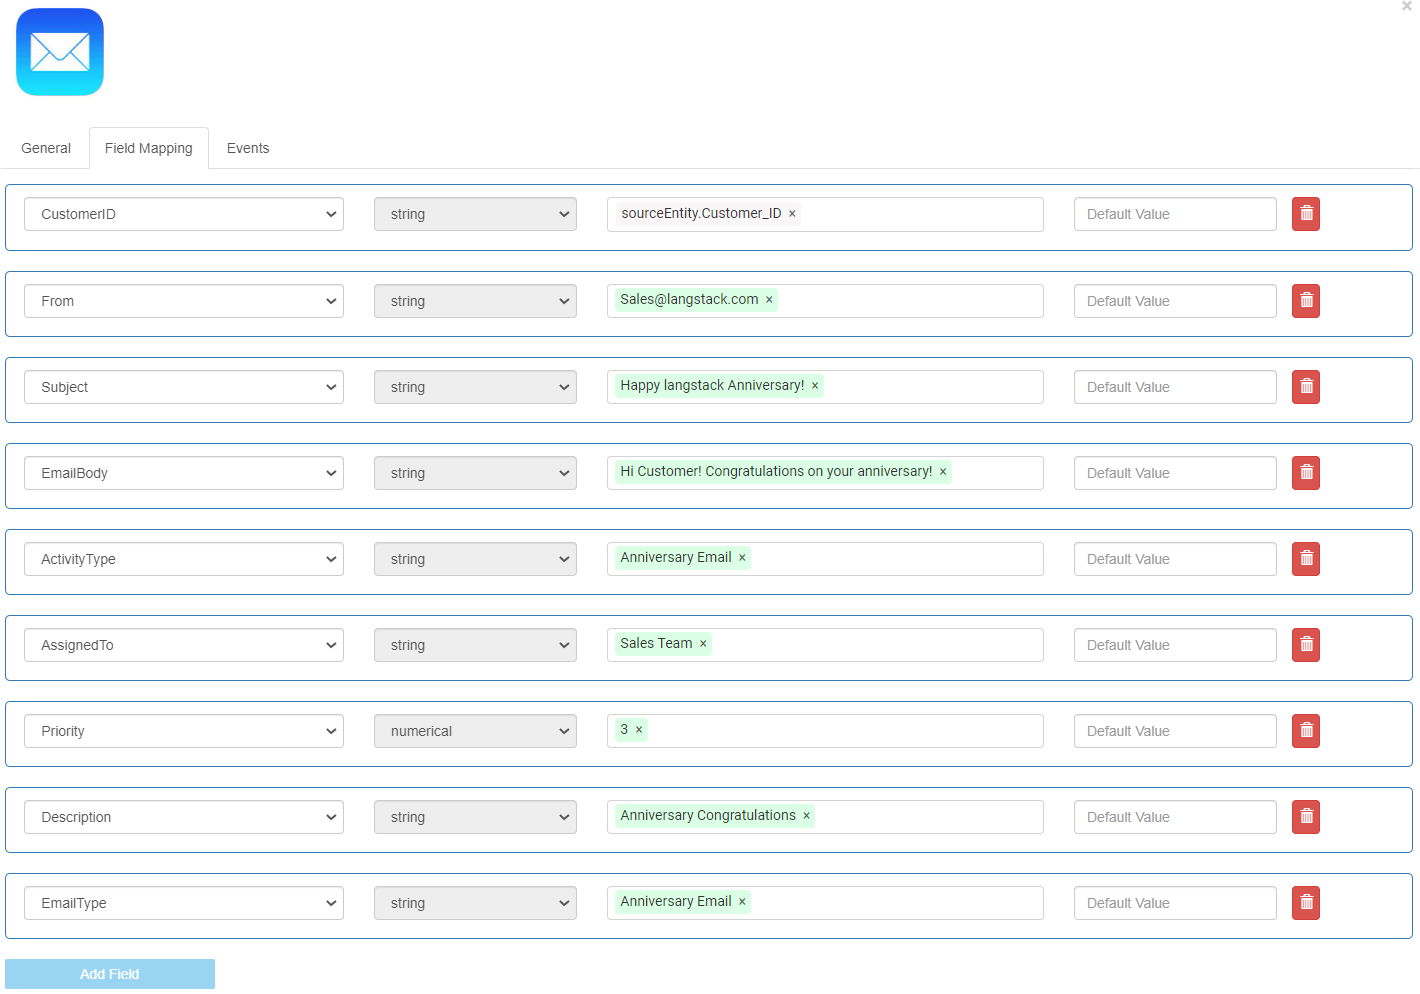
To define the sources in the Mapped Fields for this first activity (Flow component in the Flow), define the Mapped Fields as follows:
1. CustomerID: Select Source as variables>sourceEntity>Customer\_ID. It is displayed as “sourceEntity.Customer\_ID”. This mapped field retrieves the value in the Customer\_ID field from the “UserName\_Acc\_Activities” entity (source).
2. From: Enter constant text for Source as “”.
3. Subject: Enter constant text for Source as “Happy Langstack Anniversary!”
4. EmailBody: Enter constant text for Source as “Hi Customer! Congratulations on your anniversary!”
5. ActivityType: Enter constant text for Source as “Anniversary Email”.
6. AssignedTo: Enter constant text for Source as “Sales Team”.
7. Priority: Enter constant text for Source as “3”.
8. Description: Enter constant text for Source as “Anniversary Congratulations”.
9. EmailType: Enter constant text for Source as “Anniversary Email”.
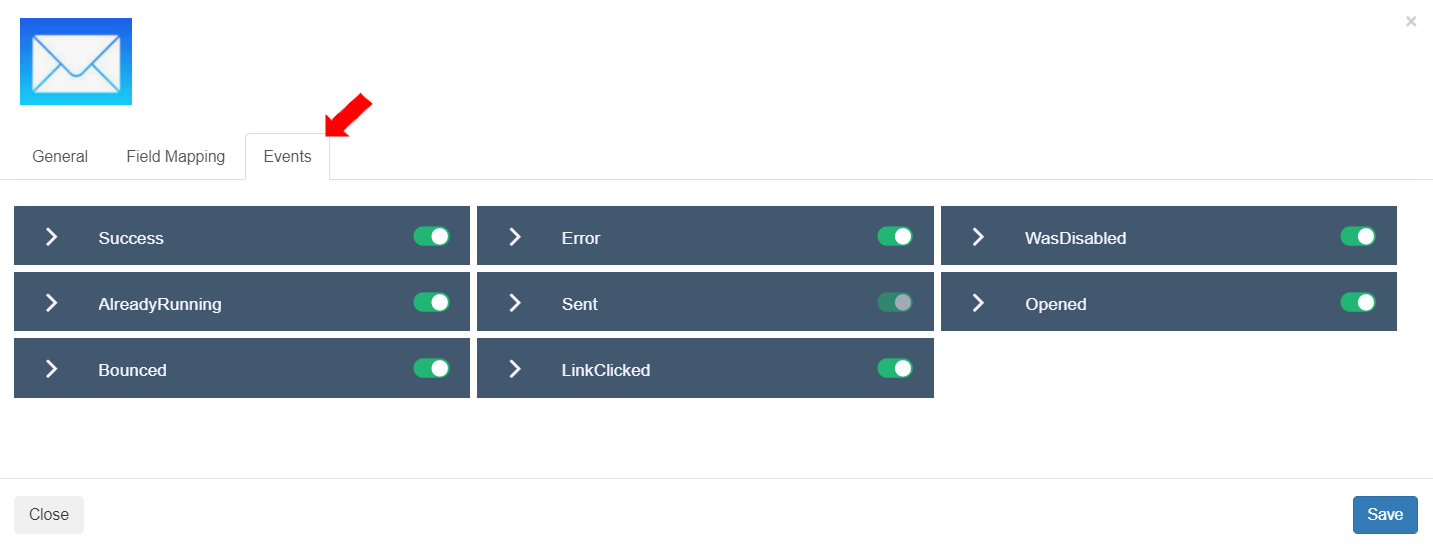
* To view and enable/disable events for this Flow component, select the “Events” tab. The eight (8) events defined in Step 1: Details>Events section are displayed and enabled.\
Users can disable any event. In this exercise, all events are enabled.
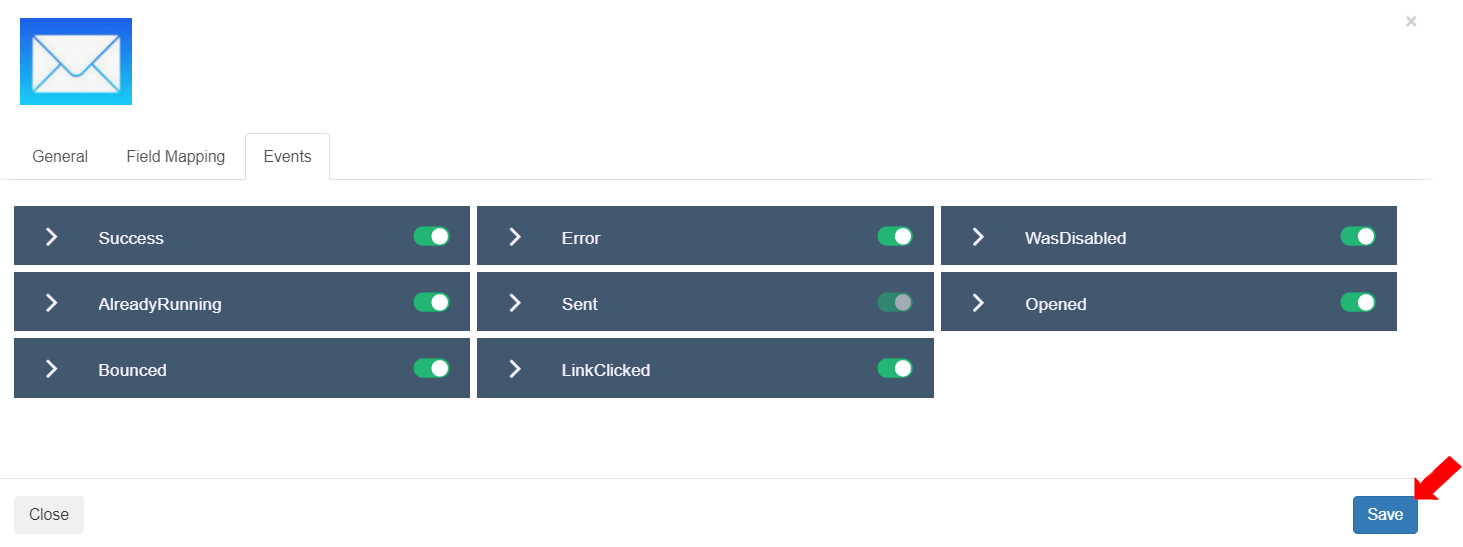
* To save the settings for the Flow component, click the \[Save] button.
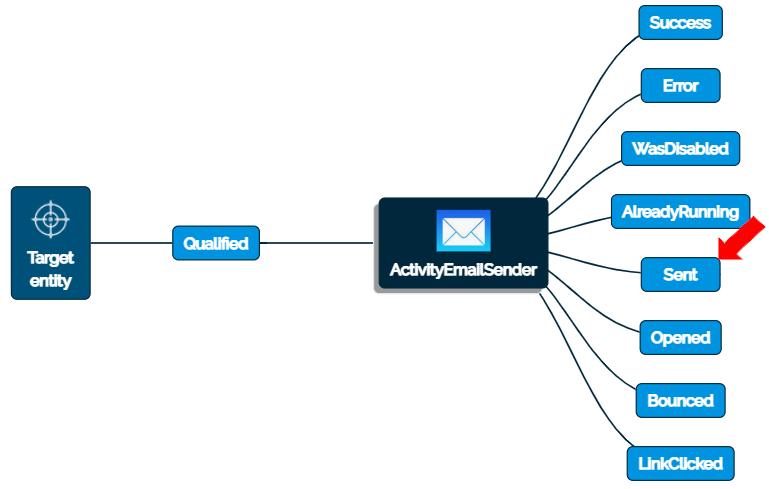
* To view the events of the Flow component “ActivityEmailSender” in the Flow, click on the Flow component. The enabled events configured in the Details>Events section will be displayed on the right side connected to this Flow component. These are the events that can be triggered for this Flow component.
{% hint style="info" %}
In case an event is disabled, it will not be displayed in the Flow.
{% endhint %}
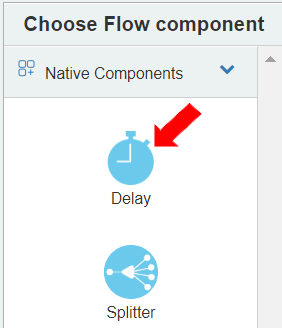
* Based on the event, another Flow component can be triggered. At this point, define a Native Flow component “Delay” to be triggered after the event “Sent”. (to give the 2 minutes delay before configuration of the second email record)
* To define the Flow component “Delay” , click “Native Components” on the left side panel. “Native Components” are predefined Flow components in which additional Events cannot be added.
*
```
```
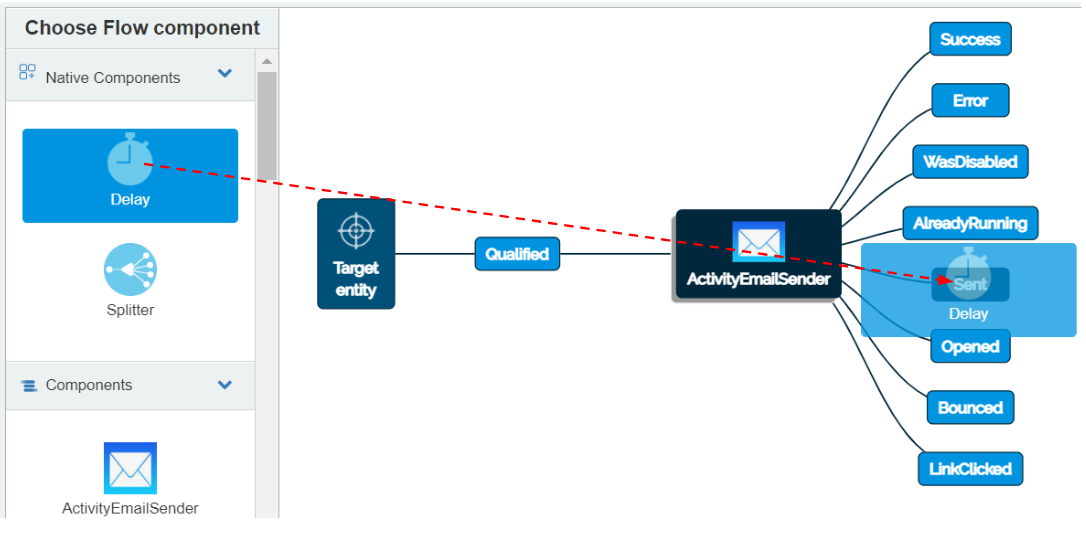
* To place the Native Flow component “Delay” in the Flow, select it.\
Drag the “Delay” Flow component and place it on the event “Sent”.
* The “Delay” Flow component is placed to the right side of the event “Sent” connected with a line. This indicates that the Delay will be called after the first email is sent.
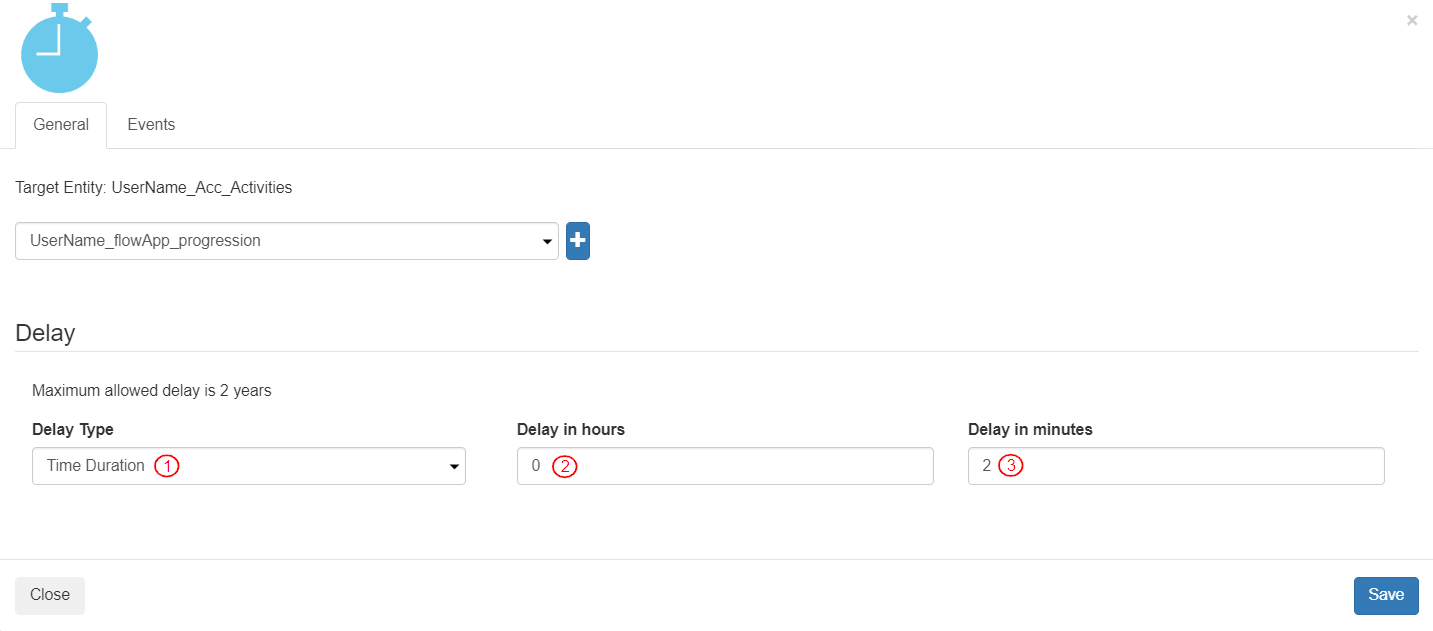
* To define the settings for the delay after the first email is sent, click “Delay” Flow component . The “Delay” Flow component configuration box will be displayed with the General tab selected by default. In the Delay settings, configure the time for delay as follows:
1. Select Delay Type as “Time Duration”. It displays two (2) more fields of “Delay in hours” and “Delay in minutes”.
2. Keep the “Delay in hours” value as “0” (zero).
3. Enter the “Delay in minutes” value as “2” (two) to keep the delay as two (2) minutes.
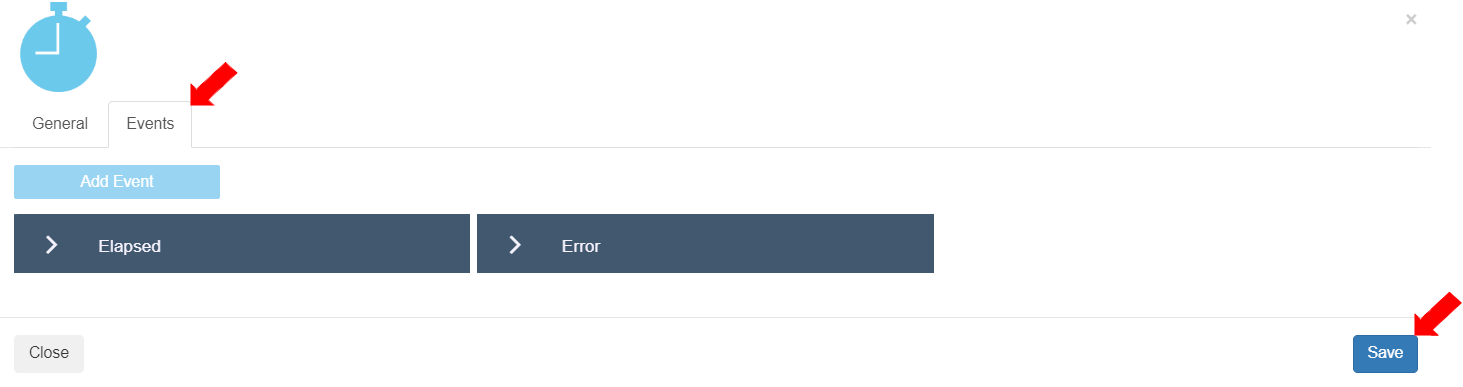
* To view the events for this Flow component and enable or disable them, select the “Events” tab. This Native Flow component has two (2) predefined events.
1. Elapsed: This event signifies that the configured time has elapsed.
2. Error: This event signifies that there is an error in execution of this Flow component. \
\
To save the settings for the Delay Flow component, click the \[Save] button.
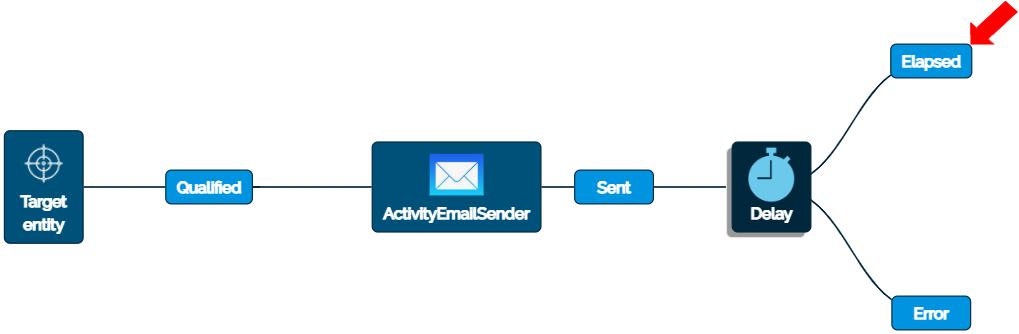
* To display the events for the Delay Flow component in the Flow, click once on the “Delay” Flow component. Both of its events will be displayed connected to the “Delay” Flow component. At this point, the next Flow component to be placed will be after “Elapsed.”
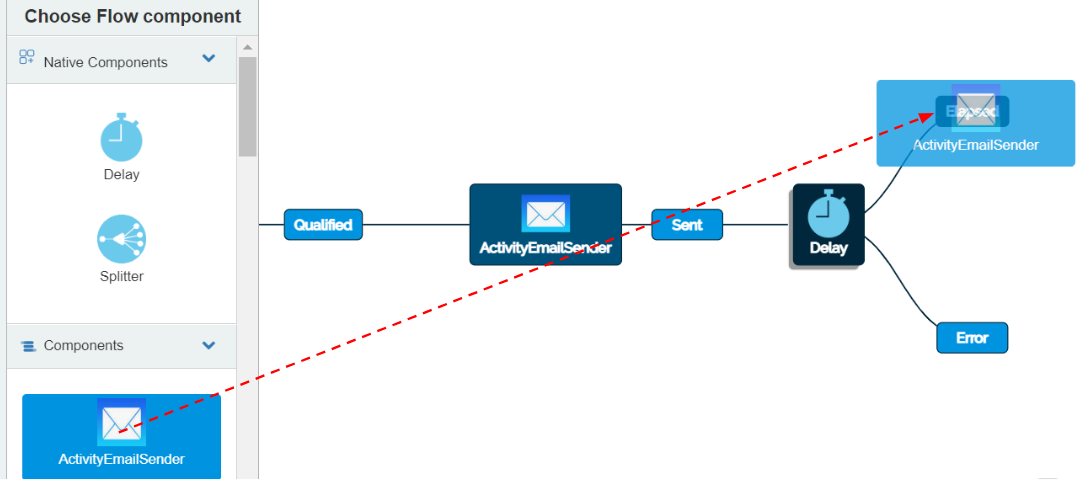
* To add the “ActivityEmailSender” Flow component onto the event “Elapsed”, go to “Components”. Select the Flow component and drag it onto the Event “Elapsed”.
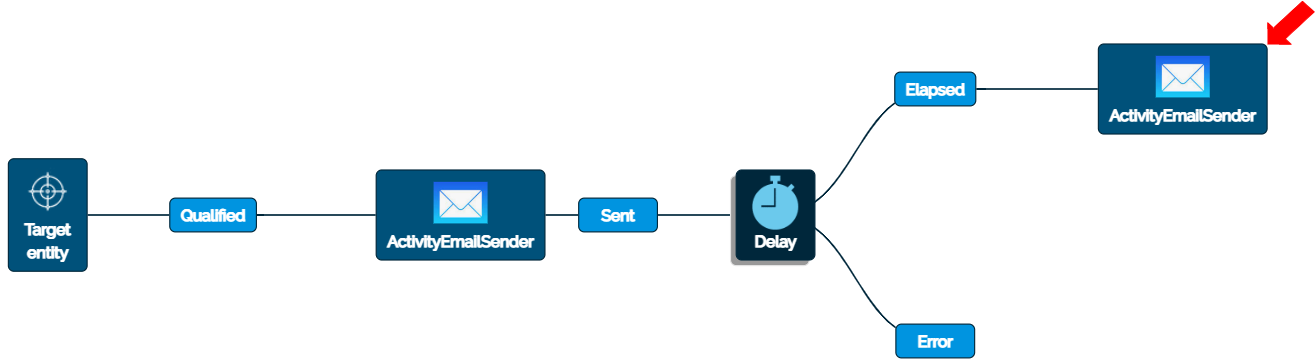
* The “ActivityEmailSender” Flow component will be placed on the right side of the “Elapsed” entity connected with a line. This indicates that this activity will be called after the delay has elapsed.
* To define the settings for the second “ActivityEmailSender” Flow component in the Flow, select the “Field Mapping” tab. \
Enter the values to create the second email record after the anniversary congratulations email.
* To add the Mapping Fields defined in Step 1 (Flow component>Details tab), click the \[Add Field] button.
* When the \[Add Field] button is clicked, the first added Mapped Field will automatically have the CustomerID name and string data type.
* To add all the Mapped Fields, click the \[Add Field] button nine (9) times (for the nine mapped fields).
* Each time the \[Add Field] button is clicked, the Mapped Fields will appear in the same order as the Mapped Fields defined in the Flow component Details>Field Mapping section. When all the Mapped Fields are added, the \[Add Field] button gets inactivated.
* To define the values for these added Mapped Fields, select the sources or add constant text for each field. The values added in these fields will be updated as the second record in the target entity for this customer. \
\
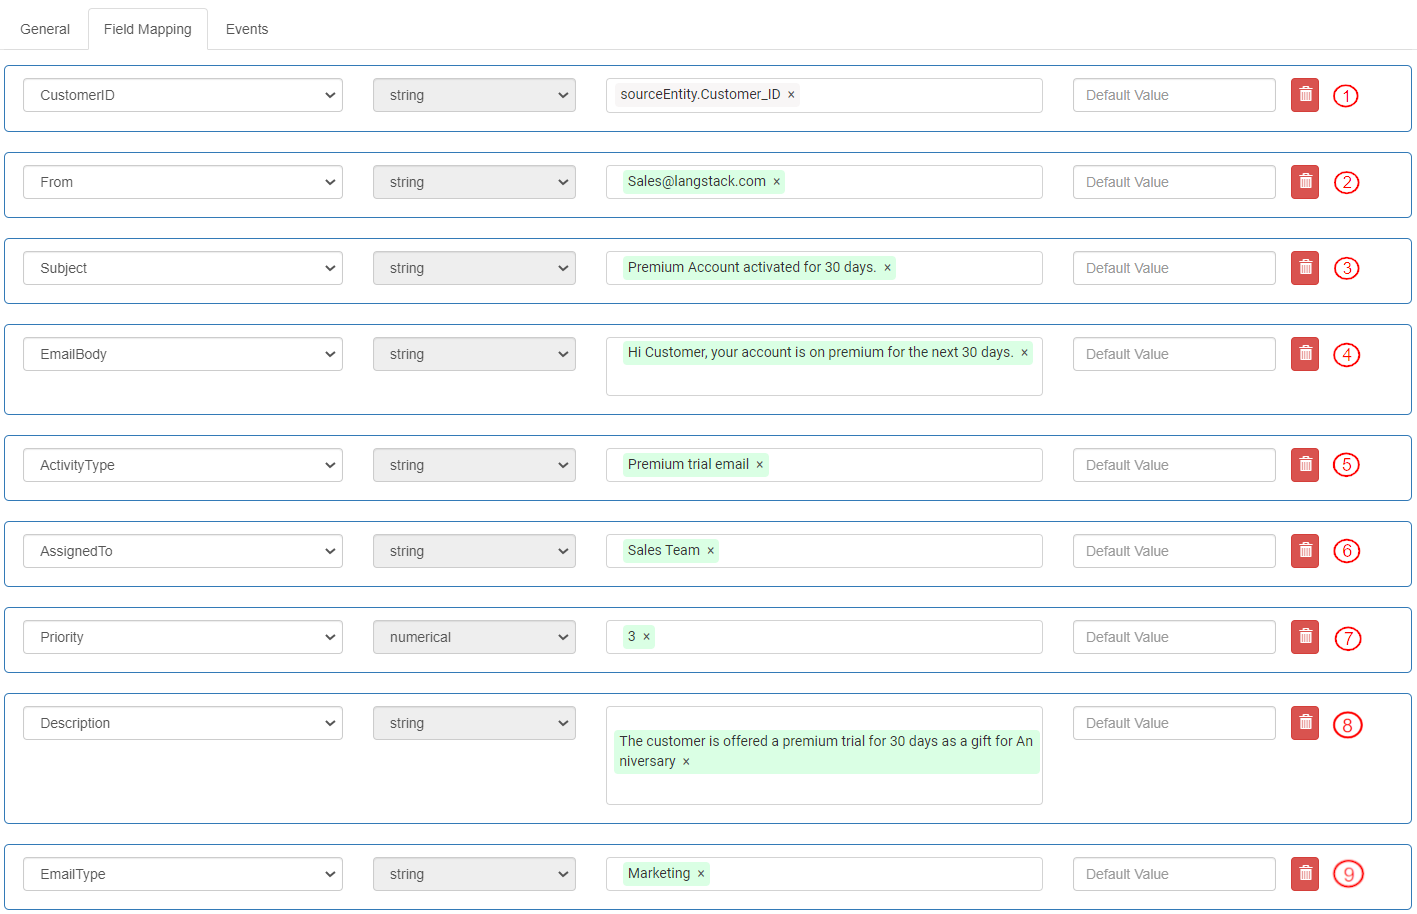
To define the Flow component the second time (as the second activity in the Flow), add the values in the Mapped Fields as follows:
1. CustomerID: Select Source as variables>sourceEntity>Customer\_ID. It is displayed as “sourceEntity.Customer\_ID”. This mapped field retrieves the “Customer\_ID” from the “UserName\_Acc\_Activities” entity (source).
2. From: Enter constant text for Source as “”.
3. Subject: Enter constant text for Source as “Premium Account activated for 30 days.”
4. EmailBody: Enter constant text for Source as “Hi Customer, your account is on premium for the next 30 days.”
5. ActivityType: Enter constant text for Source as “Premium trial email”.
6. AssignedTo: Enter constant text for Source as “Sales Team”.
7. Priority: Enter constant text for Source as “3” (without quotes).
8. Description: Enter constant text for Source as “The customer is offered a premium trial for 30 days as a gift for Anniversary”.
9. EmailType: Enter constant text for Source as “Marketing”.
* To save the settings, click the \[Save] button.

* The Flow “CustomerActivityCreated” is completed.
* To save the Flow, click the \[Save] button.

* To enable the Flow, click the \[Disabled] button to change the status to “Enabled”.
---
# Agent Instructions: Querying This Documentation
If you need additional information that is not directly available in this page, you can query the documentation dynamically by asking a question.
Perform an HTTP GET request on the current page URL with the `ask` query parameter:
```
GET https://docs.langstack.com/welcome/get-started/learn-langstack/introduction-to-flows-and-flow-components/exercise-1-customer-anniversary-email/step-2-create-the-flow.md?ask=
```
The question should be specific, self-contained, and written in natural language.
The response will contain a direct answer to the question and relevant excerpts and sources from the documentation.
Use this mechanism when the answer is not explicitly present in the current page, you need clarification or additional context, or you want to retrieve related documentation sections.